
How to Prepare Your Oven for Thanksgiving: What to Check Before Hosting
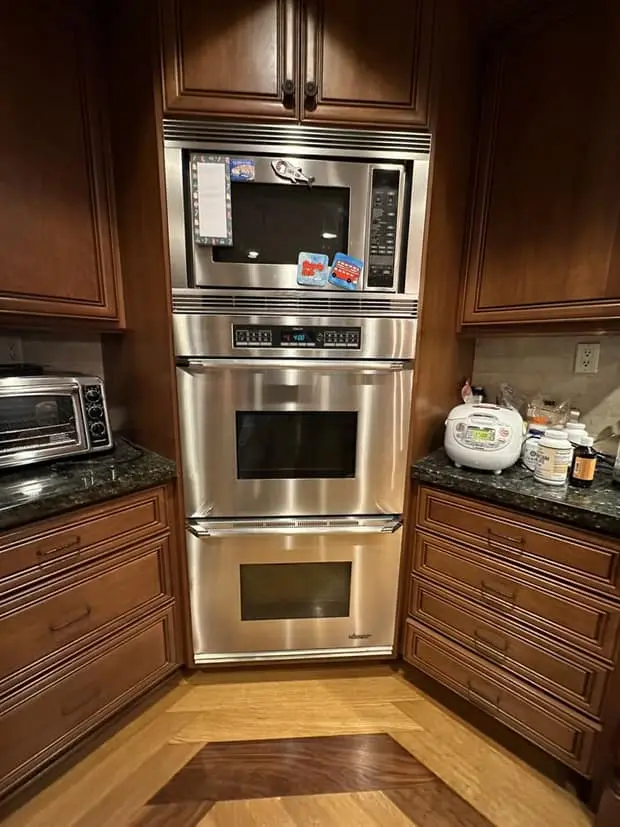
Almost nobody's oven fails on a random Tuesday in September. It fails on the morning the turkey goes in, because that is the first time all year the oven is asked to hold temperature for six hours straight with a heavy load in it and the door opening every twenty minutes. The failure was usually there for months — a preheat that got a little slower, a cookie sheet that browned unevenly, a control that had to be pressed twice. Nobody noticed, because nothing depended on it.
This guide is the pre-holiday check we would do on our own ovens, in the order that finds problems fastest. Most of it is safe to do yourself, it takes about an hour of mostly unattended time, and the point is to move any repair from Thanksgiving week — when parts suppliers are closed and every appliance company in Orange County is booked — to a quiet weekday in October.
Start three to four weeks out, and here is why
Timing is the whole strategy. An oven repair is rarely dramatic: an igniter, a bake element, a temperature sensor, a door lock motor. What makes those parts expensive in late November is not the part, it is the calendar. Distributors close for the holiday. Brand-specific parts for built-in and premium ovens — the Thermador, Viking, Wolf, Dacor and Monogram units common in Irvine, Coto de Caza and Laguna Niguel kitchens — are often not stocked locally and have to ship. A repair that is routine on November 1 becomes a scramble on November 24.
Three to four weeks ahead gives you the whole chain: test, diagnose, order, install, and still a spare week. If you are reading this closer to the holiday, do the test run anyway — knowing on Monday is still far better than knowing on Thursday.
The one-hour test run that finds almost everything
Empty the oven completely — including the sheet pan that lives in there. Then:
- Put an oven thermometer on the center rack. An inexpensive dial or probe thermometer is fine. Do not trust the display; the display shows what the control believes.
- Set 350°F and start a timer. Note how long the preheat chime takes. Most ovens reach 350°F in roughly 10 to 20 minutes; convection preheat can run longer by design. If yours has gotten noticeably slower than it used to be, that is your finding.
- Watch the heat source. On an electric oven, look through the window: the bake element at the bottom should glow evenly along its whole length, not in patches. On a gas oven, listen for the burner lighting and look for a steady blue flame, not a lazy yellow one.
- Leave it at 350°F for a full hour. Read the thermometer at the 20, 40 and 60 minute marks. Ovens cycle above and below the setpoint, so you are looking for the average, not one number.
- Feel around the closed door with the back of your hand — the frame edges and the corners. Noticeable heat escaping at one spot means the gasket or the hinge on that side.
- Test the broiler for two minutes at the end. The broil element (or the upper gas burner) is the part you will want on the day for browning, and it is the one that goes untested for years.
- Run the convection fan if you have one. It should spin up quietly. A rattle, a scrape or silence in convection mode is a finding.
Everything above is safe for a homeowner. Nothing in it requires removing a panel, touching wiring, or disconnecting a gas line.
Symptom → what it usually means
| What you observe in the test run | Most likely causes |
|---|---|
| Gas oven takes much longer to preheat than it used to | Weakening hot-surface igniter (most common), failing safety gas valve |
| Gas oven glows orange but never lights | Igniter no longer drawing enough current to open the gas valve |
| Electric oven runs but never reaches temperature | Bake element failed or partially open, control relay, sensor reading high |
| Bake element glows only in patches, or has a blister or break | Element at end of life — replace before it fails completely |
| Thermometer averages 25–50°F off the setpoint | Calibration drift — usually adjustable in the control settings |
| Thermometer off by much more, or swinging wildly | Temperature sensor (RTD) out of spec, or control board |
| Bakes hot on top, pale on the bottom (or vice versa) | One element or burner weak, convection fan not running, rack position |
| Heat escaping at one point around the closed door | Torn or flattened door gasket, sagging hinge, warped door |
| Display dark, buttons dead, or oven ignores commands | Control lock engaged, tripped breaker, thermal fuse, control board |
| Door locked and will not release after self-clean | Door lock motor or switch — do not force it |
| Breaker trips when the oven heats | Shorted element or wiring fault — stop using it and call |
Temperature accuracy: the silent Thanksgiving problem
An oven that is 40°F cool will still roast a turkey — it will just take an hour and a half longer than the recipe says, which is exactly the kind of surprise that ruins the schedule when eighteen people are waiting. An oven that is 40°F hot burns pie crusts and dries out the bird.
Ovens cycle by design: the burner or element comes on, overshoots slightly, shuts off, and drifts down before coming back. Your thermometer will swing maybe 15–25°F around the setpoint and that is normal. What matters is the average over half an hour. If it sits consistently 25 to 50 degrees off, nearly every oven built in the last two decades has a calibration offset in the settings menu — the owner's manual calls it "oven temperature adjustment" or "calibration" — and you can shift it yourself. Do that in October, then re-test, and cook the way you always have.
If the offset will not hold, or the oven is off by 75°F, or the temperature wanders unpredictably during the hour, the sensor or the control is at fault. The oven temperature sensor is a resistance probe that hangs into the cavity, usually at the upper left rear; its resistance rises with temperature along a known curve, and a technician measures it against the manufacturer's chart rather than guessing. It is an inexpensive, routine part on most models — and a very good thing to replace three weeks early rather than on the day.
Gas ovens: the igniter is the part that fails
This is the single most useful thing to understand about a gas oven. The oven does not have a pilot light. It has a hot-surface igniter — a brittle carbide or ceramic bar that glows orange — wired in series with the safety gas valve. The valve only opens when the igniter draws enough current through the circuit. As the igniter ages, it still glows beautifully but draws less and less, so the valve opens later and later. Eventually it never opens at all.
That is why the progression is so predictable: preheat takes 15 minutes, then 20, then 30, then one day the oven glows for several minutes and no flame ever appears. A homeowner sees "it's just slow." A technician sees an igniter with weeks left. If your gas oven has been getting slower, replace the igniter before the holiday — it is a routine job and one of the most common oven repairs we do.
Safe to check yourself: time the preheat, look through the oven window to see whether the igniter glows and whether the flame follows within about 30 to 90 seconds, and look at the burner flame color once lit — steady blue with maybe a small yellow tip is right. Not safe: removing the burner assembly, testing the gas valve, or attempting to light the oven burner with a match or lighter. Never do that. And if you smell gas at any time, shut off the supply, leave the house, and call the gas utility first. Cooktop burners are a different circuit from the oven burner — the cooktop working tells you nothing about the oven.
Electric ovens: elements, and the one you cannot see
Electric ovens fail more visibly. A bake element that has burned through usually shows it: a blister, a split, a bright spot, or a section that stays dark while the rest glows. If yours glows unevenly, it is on borrowed time. An element that has gone open-circuit means no bake heat at all, though the broil element may still work, which fools people into thinking the oven is fine.
Many newer ranges have a hidden bake element under the oven floor, so there is nothing to look at. On those, the symptom is heat that never arrives rather than a visual clue, and you have to rely on the thermometer. Note also that an oven running on only one of its two 120-volt legs — a partially failed breaker or a loose connection — will heat weakly and inconsistently. That is an electrical diagnosis, not a homeowner check.
Safe to check yourself: visual inspection of the exposed element when the oven is cold and unplugged or with the breaker off, and the thermometer test. Leave to a technician: continuity testing, element replacement on wall ovens where the unit must be pulled from the cabinet, and anything involving the terminal block or house wiring.
The self-clean trap: the most avoidable holiday failure
Every year, a share of our late-November oven calls trace back to the same decision: the customer ran the self-clean cycle a few days before hosting, to get the oven spotless for the holiday. A pyrolytic self-clean cycle runs the cavity at roughly 800 to 900°F for two to four hours — far hotter than any cooking — and that heat does not stay politely inside the box. It stresses the door lock motor, the wiring near the cavity, the thermal fuse that is there specifically to cut power on overtemperature, and the control board mounted just above the door.
When one of those gives up, you get an oven that is dead after the cycle, or a door that stays locked, or a control that will not respond. None of those are exotic repairs — but all of them are terrible news on November 25.
What to do instead: if you want to self-clean, run it at least three to four weeks out, and run the oven normally afterward to confirm it survived. Closer to the day, clean by hand: a cold-oven cleaner or a paste of baking soda and water left overnight, a plastic scraper, and a damp cloth. Pull the racks out and wash them in the sink — most manufacturers say not to leave racks in during self-clean anyway, because it discolors them and ruins the glide coating. And never line the oven floor with foil to catch drippings; it blocks the airflow path, reflects heat where it does not belong, skews what the sensor reads and can damage the enamel. A sheet pan on the rack below does the job safely.
Door, gasket, hinges and glass
The door is the part of an oven that gets the most abuse and the least attention. A rope gasket that has flattened, torn or pulled out of its channel lets hot air stream out, which means longer preheats, uneven browning, a hotter kitchen and a control that never quite settles. With the oven cold, run your fingers around the gasket: it should be springy everywhere, seated in its channel, with no gaps at the corners. A gasket is an inexpensive part and a straightforward replacement.
Check the hinges too. Open the door halfway and let go — it should hold position, not fall open or snap shut. Then close it and sight along the top edge: a door that sits crooked against the frame is a hinge problem, and hinges under spring tension are genuinely dangerous to work on, which puts that job squarely in technician territory. Finally, if there is grease fogging the inside of the door glass, leave it — taking a door apart for cleaning three weeks before Thanksgiving is how a working oven becomes a broken one.
Convection, probes, racks and real capacity
Function is only half of readiness. The other half is whether the plan you have in your head actually fits.
- Dry-fit the turkey. Put your roasting pan, with the rack in it, on the oven rack in the position you plan to use, while the oven is cold. Confirm the door closes and there is clearance above for the bird plus room for hot air to move. Roasting pans are taller than the sheet pans you use all year.
- Check the rack supports. Wall oven racks with glide rails get sticky and bent over time; a heavy turkey on a rack that binds and tips is a real hazard. Wash the racks and make sure they slide and seat properly in every position you intend to use.
- Test the meat probe if your oven has one. Plug it in and confirm the control recognizes it. Probe jacks and probes fail quietly.
- Decide about convection now. Convection roasts faster and browns better, but as a rule you reduce the recipe temperature by about 25°F. Work that out in October, not while the guests arrive.
- Count your oven space honestly. A turkey plus casseroles plus rolls plus pies is more oven than most single ovens have. If you have a double oven, use the test run to verify both cavities — the lower one, used far less, is more often the one with a problem.
- Remember the recovery time. Every time the door opens the cavity drops noticeably, and a full oven takes longer to come back than an empty one. Plan for basting to add time rather than assuming the recipe accounted for it.
Double ovens, wall ovens and built-in ventilation
Built-in wall ovens deserve a separate word, because they behave differently from a freestanding range. They sit in a cabinet cutout with a designed ventilation path, and when a remodel, a shelf or a well-meaning installation blocks that path, the electronics above the cavity run hotter than the manufacturer intended. Control boards and touch panels in the housing over the door are the parts that show it first. If your wall oven has had its surround modified, or if the touch panel gets unusually hot in use, that is worth a look before a day of continuous baking.
The same goes for pro-style ranges. Gas ranges with high-output burners and heavy cast grates — Thor Kitchen, ZLINE, Bertazzoni, Viking, Wolf and the rest that we see in South Orange County kitchens — are built for this kind of day, but they need their burner ports clean and their range hood actually working, because a holiday is also the day the hood runs for eight hours. We provide oven and range repair across Orange County, we are factory authorized for Bertazzoni, Thor Kitchen and ZLINE and for LG, we are Samsung-certified, and we provide professional repair for Thermador, Viking, Wolf, Dacor, KitchenAid, GE, Bosch and the other brands in local kitchens.
What only a technician should do
- Anything on the gas side: burner assemblies, the safety valve, the pressure regulator, the flexible connector, and the igniter itself.
- Element replacement, continuity and voltage testing, terminal blocks and house wiring.
- Temperature sensor testing against the manufacturer's resistance chart, and control board diagnosis.
- Door lock motors and switches, especially a door locked after a failed self-clean cycle.
- Oven door hinges, which are spring-loaded and can close with real force.
- Pulling a built-in wall oven out of its cabinet — they are heavy, hard-wired, and easy to damage.
The homeowner line is a clean one: you can observe, time, measure with a thermometer, clean, and adjust settings. Panels stay on.
Your refrigerator carries half the holiday too
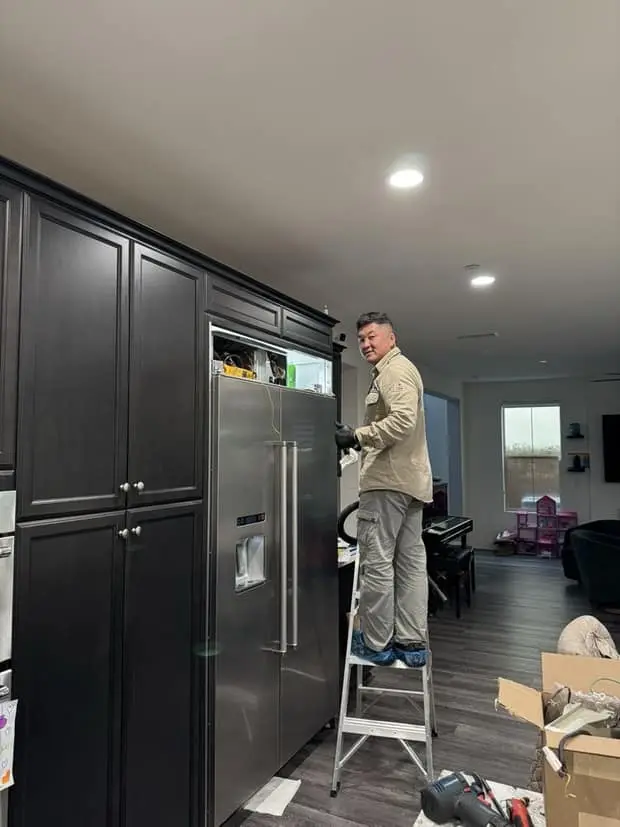
It is worth ten minutes on the refrigerator while you are at it, because Thanksgiving loads it harder than any other week of the year: a thawing turkey, days of prep, a door that opens every few minutes, and afterward a box full of leftovers. A refrigerator that has been quietly running at 42°F instead of 37°F copes with normal use and fails visibly under holiday use.
Put a thermometer in the fresh-food compartment, vacuum the condenser coils behind the base grille, wipe the door gaskets, and check that the ice maker is keeping up — you will want ice. If anything looks off, our guides on a refrigerator that is not cooling, a freezer that is not freezing and an ice maker that stopped walk through the causes, and the same "fix it in October" logic applies. Thawing a turkey safely in the refrigerator takes about 24 hours for every 4 to 5 pounds, per USDA guidance, so a cooling problem discovered on the Monday is a real schedule problem.
A timeline you can actually follow
- Three to four weeks out: the one-hour test run at 350°F with a thermometer. Broiler test. Convection fan. Door and gasket check. If you want to self-clean, this is the window. Book any repair now.
- Two weeks out: calibration adjusted and verified. Racks washed and refitted. Dry-fit the roasting pan. Confirm the meat probe. Check the range hood filters.
- The week of: hand-clean only. No self-clean, no experiments, no disassembling anything. Bake something ordinary to confirm the oven is behaving.
- The day before: preheat once to make sure nothing changed, clear the oven of stored pans, and know where your breaker panel and your gas shutoff are.
- Thanksgiving morning: preheat early, keep the door closed, and let the thermometer — not the display — tell you the truth.
When to stop and call
- Any smell of gas — shut off the supply, leave, and call the gas utility before anyone else.
- A gas oven that glows but will not light, or a burner flame that is mostly yellow and sooty.
- A breaker that trips when the oven heats, any arcing or sparking, or a burning-plastic smell.
- A door locked after a self-clean cycle. Do not pry it — the latch assembly breaks and the repair grows.
- An oven more than 50°F off that the calibration setting will not correct.
- A bake element with a visible break, blister or bright spot.
- A built-in wall oven or pro-style range with a control fault — those parts are model-specific and worth ordering early.
- And if the oven is old enough that you are wondering about the bigger question, our repair-or-replace guide lays out how to think about it — although November is the month to repair and January is the month to replace.
What we do when we arrive
Our technician measures actual cavity temperature against the setpoint through a full cycle, tests the igniter circuit or the elements depending on fuel type, reads the sensor's resistance against the manufacturer's chart, checks the control's error history where the model supports it, and inspects the door seal, hinges and lock. You get an explanation of what failed and a quote before any work begins, and the repair is covered by our 90-day parts and labor warranty. Most oven repairs are completed in a single visit when the part is a common one, which is exactly why the pre-holiday test run matters: it turns a same-day problem into a scheduled one. See what to have ready in our before the technician arrives checklist, and the rest of the season's prep in our appliance maintenance checklist.
We cover the whole South Orange County corridor for oven and range work — Irvine, Lake Forest, Tustin, Mission Viejo, Laguna Hills, Laguna Niguel, Aliso Viejo, Rancho Santa Margarita, San Juan Capistrano, Dana Point and San Clemente — plus Costa Mesa and Huntington Beach. November fills up fast; an October appointment is a calm one.
Frequently Asked Questions
How far ahead should I test my oven before Thanksgiving?
Three to four weeks. That is enough time for a part to be ordered and installed without paying for the holiday rush, and it is the difference between a scheduled repair and an emergency. A test run is simple: set 350°F, let the oven fully preheat, and leave it running for an hour with an oven thermometer inside while you watch how it behaves.
Should I run the self-clean cycle before Thanksgiving?
Not in the week before. A pyrolytic self-clean cycle heats the cavity to roughly 800–900°F for hours, and that heat is hard on the door lock motor, the thermal fuse and the control board. Self-clean failures are one of the most common reasons an oven dies right before a holiday. If you want to self-clean, do it at least three to four weeks out so there is time to fix anything it breaks — or clean by hand instead.
My gas oven takes forever to preheat. What is wrong?
On most gas ovens that is a weakening hot-surface igniter. The igniter has to draw enough current to open the safety gas valve, and as it ages it glows but no longer pulls enough current, so the valve opens late or not at all. The classic progression is preheat times that get longer over months, then an oven that glows orange and never lights. The igniter is a routine replacement and should be done before a holiday, not during one.
How do I know if my oven temperature is accurate?
Put an inexpensive oven thermometer on the center rack, set 350°F, and read it after the oven has been up to temperature for about 20 minutes. Ovens cycle, so read it several times over 20–30 minutes and average. If the average is off by 25–50°F, most ovens have a calibration offset in the control settings you can adjust. If it is off by more than that, drifting wildly, or the offset will not hold, the temperature sensor or the control is the problem and needs a technician.
Can I line the bottom of my oven with foil to catch turkey drippings?
No. Foil on the oven floor blocks the airflow path and reflects heat back at the bottom element or the gas burner, which skews the temperature the sensor reads, causes uneven baking, and can damage the enamel or the element. Most manufacturers prohibit it. Use a sheet pan on the rack below the turkey instead.
My oven broke on Thanksgiving morning. What now?
Check the basics first: the breaker for an electric oven, any control lock or delayed-start setting, and whether the door latched from an interrupted self-clean. Do not force a locked door and do not try to light a gas oven manually. If you smell gas, shut off the supply, leave the house and call the gas utility before anyone else. Then move to a plan B — a countertop oven, a grill with a lid, or a neighbor's kitchen — and book the repair for the next available day.
Related Pages
- Oven & Range Repair in Orange County
- Oven & Range Repair in Irvine
- Symptom Index — What's Wrong With My Appliance?
- Maintenance That Prevents Most Repairs
- Before the Technician Arrives
- Repair or Replace?
- Understanding Your Warranty
- Refrigerator Not Cooling — 10 Causes
- Ice Maker Not Working
- Factory Authorized Thor Kitchen Repair
- Factory Authorized ZLINE Repair
- Irvine · Lake Forest · Mission Viejo · Laguna Niguel · San Clemente