
Why Is My Oven Not Heating? Igniter, Bake Element, Sensor and Control Board Explained
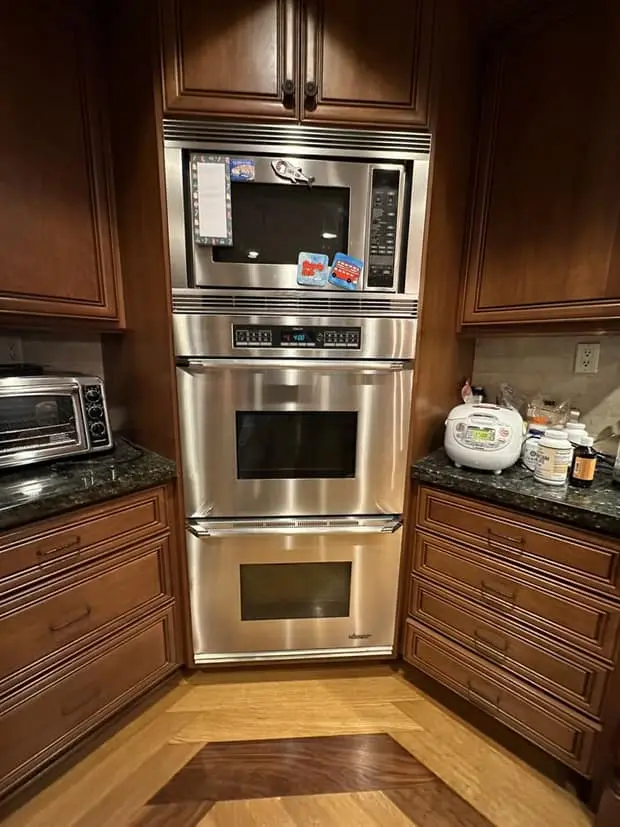
An oven that will not heat is one of the few appliance failures that changes your plans for the day. There is no workaround and no half-measure: dinner moves, the baking stops, and if you are hosting, the problem is suddenly on a deadline. The good news is that "my oven is not heating" is not one fault. It is a small family of faults, each with a distinct signature, and most of them are single-part repairs on an appliance that is otherwise fine.
This guide walks through what actually stops an oven from heating in a gas oven and in an electric one, how the symptoms separate the causes, the checks you can safely make yourself in ten minutes, and the line past which the work belongs to a technician. We repair gas and electric ovens, wall ovens, double ovens and ranges across Irvine and the rest of South Orange County, and the pattern below is the one we work through on those calls.
First, define the problem precisely
Before anything else, put your complaint in one of these four boxes. It narrows the list more than any other single step.
- No heat at all. The oven accepts the setting, the fan may run, the display counts, but nothing in the cavity gets warm. On a gas oven you never hear the burner light; on an electric oven the element never glows.
- Heats, but never reaches the set temperature. It gets warm — maybe 200 to 250°F when you asked for 375°F — and stalls there, or the preheat tone never sounds at all.
- Very slow to preheat. An oven that used to reach 350°F in ten to twelve minutes now takes twenty-five or forty. This is the classic early warning, and it is the one people ignore.
- Heats, then quits partway through. Preheat is normal, then an hour into a roast the cavity has gone cold, or the oven cuts out and the display shows a code.
Then note one more thing: does anything else on the appliance still work? On a range, do the surface burners or surface elements still work? Does broil work when bake does not? Does the second cavity of a double wall oven heat normally? Each of those answers eliminates whole branches of the diagnosis, and every one of them is something you can tell us on the phone before we ever open a panel.
Symptoms and what they point to
| What you observe | Most likely causes |
|---|---|
| Gas oven: igniter glows orange for several minutes, no flame, no heat | Weak igniter drawing too little current to open the safety valve (1) — by far the most common; less often the safety valve itself (9) |
| Gas oven: igniter never glows at all | Open igniter circuit, failed igniter, control board relay (5), thermal fuse (6), no power to the oven (7) |
| Gas oven: takes far longer to preheat than it used to | Igniter aging — the same fault as above, caught early (1) |
| Electric oven: no heat, surface elements work normally | Failed bake element (2), lost 240-volt leg (7), control board relay (5) |
| Electric oven: broil works, bake does not (or the reverse) | The failed element is the one that does not work (2, 3) — the board and sensor are usually fine |
| Electric oven: element glows in places, or has a blistered or split section | Element at end of life (2) — stop using it |
| Oven heats but settles well below the setting, food underdone | Temperature sensor drifted (4), calibration offset, weak element or igniter (1, 2), door seal or hinge (8) |
| Oven throws an F- or E- code and will not heat | Sensor open or shorted (4), control board (5), latch circuit (8) — read the code, it is diagnostic |
| Stopped heating right after a self-clean cycle | Thermal fuse or thermal cutoff (6), stuck door latch (8), heat-damaged control board (5) |
| Display dead, no response to any button | Power (7), thermal fuse (6), control board or its transformer (5) |
| Oven is on but nothing responds and the display looks like a showroom | Demo or showroom mode, control lock, Sabbath mode, delay start (10) |
| Breaker trips when the oven is turned on | Shorted element or wiring — stop and call (2, 7) |
Gas or electric? It changes everything
Homeowners are sometimes unsure, especially with a wall oven, and the distinction decides which half of this guide applies to you. A gas oven has a burner tube along the bottom of the cavity, usually hidden under a metal flame spreader, and it will have a gas shutoff valve on the supply line behind or below it. An electric oven has a visible bake element — a thick metal loop across the floor of the cavity, or, on many modern ranges, no visible element at all because it is concealed beneath the cavity floor. Dual-fuel ranges, common in the newer Irvine and Tustin Legacy kitchens, pair gas surface burners with an electric oven; if you have one of those, the burners lighting tells you nothing about the oven, and the electric section below is the one that applies.
1. The gas oven igniter: the fault that hides in plain sight
If we had to name one part that accounts for more gas oven no-heat calls than anything else, it is the hot-surface igniter. Understanding why requires one piece of knowledge that most homeowners do not have, and it is the reason so many people replace the wrong part.
In a standard gas oven there is no pilot light and no separate valve control. The igniter is wired in series with the oven's safety gas valve. When you set a temperature, current flows through the igniter; the igniter heats up and glows; and the amount of current it draws is what energizes a bimetal in the safety valve and opens it. Gas then flows across the already-glowing igniter and lights.
As a hot-surface igniter ages, its internal resistance climbs. Higher resistance means lower current. The igniter still gets hot enough to glow a convincing orange — which is why it looks perfectly healthy — but the current has fallen below the threshold the valve needs. First the oven takes longer and longer to light, because the valve opens slowly or only after the igniter has been on for minutes. Eventually the valve does not open at all, and you get a beautifully glowing igniter and a cold oven.
What this means for you: a glowing igniter is not evidence that the igniter is good. The only real test is a current measurement on the igniter circuit while the oven calls for heat, compared against the specification for that model, and that is a technician's measurement on a live circuit. What you can do safely is time it. Set the oven to 350°F and watch the igniter through the bottom vent or with the flame spreader in place. On a healthy oven the burner lights within roughly 30 to 90 seconds of the igniter beginning to glow. If the igniter glows for three, four or five minutes before the burner lights — or never lights — you have almost certainly found your fault, and the part is on borrowed time even if the oven still works today.
This is also the fault behind most "my oven is slow to preheat" complaints, and it is the reason we push people in Irvine, Tustin and Lake Forest to test the oven in early autumn rather than the week they plan to host. A gradually weakening igniter gives you weeks of warning and then quits on the worst possible morning.
2. The bake element on an electric oven
The electric equivalent of the igniter story is simpler and more visible. The bake element is a sheathed resistance heater, and like any resistance heater it eventually fails — usually by developing a hot spot that blisters, splits or burns through. When the element opens, the oven has no bake heat at all. The stovetop is unaffected, the display works, the convection fan may run, and the cavity stays cold.
An element that has failed visibly is easy to spot: look for a swollen, blistered or split section, a break in the loop, or a scorch mark on the cavity floor beneath it. Some elements fail with no visible sign, which is why a technician measures continuity and resistance rather than relying on the eye. And one important warning: an element that is arcing — sparking, flashing white or blue at one point, tripping the breaker — is a live electrical fault. Switch the oven off at the breaker and do not use it until it has been repaired.
A useful diagnostic you can run yourself: try broil. The broil element is a separate part on a separate circuit from the same control board. If broil heats normally and bake does nothing, the board and the sensor are almost certainly fine and the bake element is the suspect. If neither heats, the problem is further upstream — the board, the supply, or a thermal fuse.
3. Hidden elements, convection elements and the second cavity
Many current ranges have no exposed bake element. The heater is beneath the cavity floor, which makes cleaning easier and diagnosis harder, because you cannot see the blistered spot that would have given the answer away. The symptom set is identical to a visible element; the difference is only that the oven has to come apart to confirm it.
True convection ovens add a third heater — a ring element around the convection fan at the back of the cavity. A failed convection element produces a specific and confusing complaint: conventional bake works, convection bake does not, or convection results have quietly gone flat and uneven. If your oven bakes acceptably on the regular setting but the convection mode has stopped browning properly, that ring element and its relay are the place to look, not the bake element.
Double wall ovens, which are standard in a lot of the newer Irvine, Tustin Ranch and Baker Ranch kitchens, deserve their own note. The two cavities usually share one control board but have their own elements, sensors and relays. If the upper cavity heats and the lower does not, the shared parts are proven good and the fault is in the dead cavity's own circuit. That single observation saves real diagnostic time, so it is worth mentioning when you call.
4. The oven temperature sensor
The sensor is the thin metal probe sticking into the upper rear of the cavity. It is a resistance thermometer: its electrical resistance changes in a precise, known way as it heats, and the control board reads that resistance to decide how hot the oven is and whether to keep calling for heat. When it lies, the board acts on the lie.
There are three failure patterns and they look nothing alike:
- Open circuit. The board sees an impossible reading, throws an error code and refuses to heat at all. This looks like a dead oven but is one of the cheaper parts on the appliance.
- Shorted or drifted low. The board believes the cavity is hotter than it is, so it cuts the heat early. The oven warms, stalls well below the setting, and everything comes out pale and underdone. This is the pattern people describe as "my oven does not get hot enough anymore."
- Drifted high. The reverse — the oven overshoots, the edges of everything brown too fast, and the thermometer inside reads well above the setting.
There is a check you can do without tools: put an inexpensive oven thermometer on the middle rack, set 350°F, and let the oven run at least twenty minutes past the preheat tone so the cycling settles. An oven that stabilizes within about 25°F of the setting is behaving normally — ovens swing above and below the target by design. One that settles 50 or 75°F low, or never stops climbing, has a real problem worth diagnosing. A technician confirms it by measuring the sensor's resistance at a known temperature against the manufacturer's chart, which is what separates a bad sensor from a bad board — the two produce nearly identical complaints.
A word on calibration: most ovens allow a small offset, typically up to about 35°F either way, through the control panel. That feature exists for minor, stable drift. Using it to paper over a 75°F shortfall does not fix anything — it hides a failing sensor or a weak heater until the appliance fails outright.
5. The control board and its relays
The electronic control board — the EOC, in service literature — reads the sensor, runs the clock and the modes, and switches the heaters through mechanical relays soldered to the board. Those relays are the part that most often fails. A relay's contacts pit and burn from thousands of switching cycles until they no longer close reliably, and the result is an oven that ignores the bake command while everything else on the panel works perfectly.
Board faults look like: no heat with no error code and a fully responsive display; an oven that heats intermittently, working one day and not the next; a display that garbles, resets or goes blank; or heat that will not shut off when the oven is turned off. That last one is a reason to switch the oven off at the breaker and call rather than wait.
Boards are worth diagnosing carefully rather than guessing at, for two reasons. They are typically the most expensive single part in an oven, and they are frequently blamed for faults that turn out to be a sensor, a fuse or a wiring connection. A proper diagnosis proves the board is at fault before anyone orders one.
6. Thermal fuses and thermal cutoffs
Ovens carry one-shot thermal protection: a fuse or a thermal cutoff switch that opens permanently if the cavity or the component compartment exceeds a safe temperature. When it opens, it kills power to the bake circuit and on many models to the entire control. The oven goes completely dead, or heats not at all, with no warning and no code.
The critical point is that a blown thermal fuse is a symptom, not a cause. Something made that compartment too hot — a cooling fan that stopped, a blocked vent, an element or relay stuck on, or a self-clean cycle on an oven with tired insulation. Replacing the fuse without finding out why it opened means the new fuse blows too, and the second failure sometimes takes the board with it. This is a repair where the diagnosis is the whole job.
Self-clean deserves the blame it gets here. The cycle takes the cavity to roughly 850 to 900°F for several hours, and that is the single hardest thing an oven ever does. Blown thermal fuses, cooked control boards, failed door latch motors and degraded wiring insulation cluster right after a self-clean. If you run it at all, run it weeks before any occasion you need the oven for — never the night before.
7. Power: the half-tripped breaker and the loose connection
An electric range or wall oven runs on 240 volts, delivered as two 120-volt legs through a double-pole breaker. Those two poles can fail independently. When one leg is lost, you get a set of symptoms that reads like a broken appliance but is really a broken supply: the display and clock work fine on the surviving 120 volts, the surface elements may work, and the oven does not heat.
The check is quick and it is one of the few things worth doing before you call. Find the double breaker for the range or oven, switch it fully off — not to the middle detent position, all the way to OFF — wait about thirty seconds, then switch it firmly back on. A breaker that has tripped often does not look tripped, and pushing it toward ON without first going fully OFF does not reset it. Do the same on a wall oven's dedicated breaker.
If the breaker trips again when the oven is switched on, stop there. That is a short circuit — usually an element or its wiring — and repeatedly resetting a breaker into a fault is how a nuisance becomes a hazard. Other supply-side faults, such as burned terminals at the range's terminal block or a scorched connection in the junction box behind a wall oven, are visible only with the appliance pulled and the power off at the panel, which is technician work.
Gas ovens need electricity too. A gas range plugged into a GFCI outlet behind it that has tripped will do nothing at all, and the outlet behind a range is one of the least-checked outlets in any house.
8. The door: latch, switch, hinges and gasket
The door participates in the heating circuit more than people expect. Every oven has a latch or door switch the control monitors, and if the board believes the door is locked when it is not — a latch motor stuck partway after self-clean, a failed switch, a broken latch cam — it will refuse to heat, often with a code and often with no other symptom. Never force a latched door; the mechanism breaks and turns a modest repair into a larger one.
A door that will not seal is a different, subtler problem. Worn hinges let the door sag so the top corner stands off by a fraction of an inch; a hardened or torn gasket lets heat escape around the perimeter. Neither stops the oven heating, but both cause it to run long, cycle constantly, never quite hold temperature and brown unevenly — which is easy to mistake for a sensor or element fault. Two checks: close the door on a strip of paper at several points around the frame and see whether it pulls out with equal resistance everywhere, and run your hand a few inches from the closed door during a bake, feeling for a stream of hot air escaping at one spot.
9. Gas supply and the safety valve
If the surface burners on a gas range light normally, gas is reaching the appliance and the supply is not your problem. If nothing gas-fired in the house is working, the issue is upstream of the oven entirely.
The oven's own safety gas valve can fail, though it does so far less often than the igniter. Because a weak igniter and a failed valve produce the same complaint — igniter glows, no flame — the two have to be separated by measuring igniter current, not by guessing. Ordering a valve because the igniter looked fine is a common and expensive mistake.
One rule overrides everything else in this section. If you smell gas, stop. Do not operate switches, do not use the oven, do not look for the leak yourself. Leave the house and call SoCalGas from outside — they respond to gas odor calls at no charge. Come back to the repair question afterward.
10. Settings, modes and the oven that is not actually broken
A small but real share of no-heat calls are not failures at all, and it costs nothing to rule them out:
- Control lock. Usually a padlock icon, usually cleared by holding one button for a few seconds. It disables the oven while leaving the display alive.
- Sabbath mode. Disables the display feedback and much of the normal behavior. It can be entered accidentally and is not obvious once you are in it.
- Delay start or a timed bake that ended. The oven is waiting for a start time, or already ran and shut itself off.
- Demo or showroom mode. The panel responds perfectly and nothing heats. Some models can drop into it after a power interruption — worth knowing in neighborhoods that see occasional outages during autumn wind events.
- An unfinished self-clean. The oven will not accept a bake command until the cycle has completed and the cavity has cooled enough for the latch to release.
The owner's manual for your exact model number settles all five in a few minutes, and the model number is usually on a plate behind the door or along the frame.
What you can safely check yourself, in order
- Rule out the settings. Control lock, Sabbath mode, delay start, demo mode, an incomplete self-clean cycle.
- Reset the power. The double breaker fully OFF for thirty seconds, then firmly ON. For a gas range, also check the outlet behind it, including a tripped GFCI.
- Read and write down any error code before it clears. An F- or E- code is the most useful single piece of information you can give a technician.
- Test what still works. Surface burners or elements, broil versus bake, convection versus conventional, the other cavity on a double oven.
- Gas oven: time the igniter. Set 350°F and count from when it starts glowing to when the burner lights. Over about 90 seconds is a finding; no light at all after five minutes is your answer.
- Electric oven: look at the element. Cold oven, power off at the breaker, look for blistering, splits or scorch marks. Do not touch or bend it.
- Verify the temperature. An oven thermometer on the middle rack, 350°F, read twenty minutes after the preheat tone.
- Check the door. The paper test around the perimeter and a hand near the closed door during a bake.
- Note the model and serial number. It is on a plate behind the door or on the frame, and it lets us confirm the right part before the visit.
That is the complete list of what is safe without tools. Everything past it involves live 240-volt circuits, gas connections or a partially disassembled appliance. Our guide on what to do before the technician arrives covers how to make the visit go faster once you have gathered this.
What only a technician should do
- Measuring igniter current on a live gas oven circuit — the one test that actually proves whether an igniter is good.
- Testing elements, sensors, fuses and relays with a meter, and interpreting resistance against the manufacturer's chart for that model.
- Any work on the gas valve, burner tube or gas connections, including the leak check afterward.
- Replacing a bake, broil or convection element, which means disconnecting 240-volt wiring inside the cavity or behind the rear panel.
- Diagnosing why a thermal fuse opened before replacing it, so the new one does not blow the same week.
- Control board diagnosis and replacement, including confirming the board is at fault rather than what it is reporting.
- Pulling and reinstalling a built-in wall oven. These are heavy, fitted into cabinetry to close tolerances, and easy to damage — the cabinet, the oven and the person doing it.
Repair or replace?
Most of what is described above is a single-part repair on an appliance whose cavity, door, racks and cabinetry are in good shape, and in that situation repair is the straightforward choice — an igniter, an element, a sensor or a fuse restores a fully functional oven. The calculation changes in a few specific cases: a control board failure on a unit already well into its second decade, two or more major parts failing at once, a cavity with structural rust or damage, or a built-in wall oven where the model has been discontinued and parts are scarce. Our broader guide on repair versus replacement lays out how we think about it, and it is worth reading before you shop rather than after.
Two practical notes. First, a built-in wall oven is rarely a simple swap — cutout dimensions changed across generations, and replacing one often means cabinet work as well as an appliance purchase, which pushes the balance toward repair further than most people expect. Second, check the paperwork before you decide anything: sealed and major components sometimes carry longer coverage than the general warranty, and our guide to appliance warranties explains what to look for. Every repair we complete carries a 90-day parts and labor warranty, and the technician quotes the job on site before any work starts.
Preventing the next no-heat call
Ovens give more warning than almost any other appliance, which means most no-heat emergencies were avoidable:
- Treat slow preheat as a fault, not a quirk. It is the early stage of a failing igniter or a weakening element, and it is the cheapest moment to deal with either.
- Verify the temperature twice a year with a thermometer. Drift is gradual enough that you adapt to it without noticing.
- Be deliberate about self-clean. Use it sparingly, never right before you need the oven, and wipe out heavy spills by hand so the cycle has less to burn off.
- Keep the cavity floor clear. Foil laid across the bottom traps heat against the element or the burner baffle, damages the finish, blocks airflow and skews the sensor reading. Use a sheet pan on a lower rack instead.
- Clean spills off the door gasket and check the door for sag once a year. A sealing door is free efficiency.
- Do not let the oven sit unused for months. Run it before the season you need it — the appliance that has been idle since spring is the one that fails in November.
The same logic sits behind our Thanksgiving oven checklist and the broader appliance maintenance checklist: an hour of testing in a quiet week costs nothing, and it is the difference between a scheduled repair and a ruined holiday.
When to stop and call
Switch the oven off and call rather than continue troubleshooting if any of these apply:
- You smell gas at any point — leave the house first and call SoCalGas from outside.
- The breaker trips when the oven is switched on, or trips repeatedly.
- You see arcing, sparking, scorch marks, melted insulation or a blistered or split element.
- There is a burning or electrical smell that is not food.
- The oven will not shut off, or heats when it has not been asked to.
- The door is locked and will not release after the cavity has fully cooled.
- The control panel is dead, unresponsive or behaving randomly.
What we do on the call
A no-heat oven diagnosis follows the same order every time. We confirm the symptom and read any stored codes, verify the supply at the appliance, and then go after the circuit the symptom points to: igniter current on a gas oven, element and relay continuity on an electric one, sensor resistance against the model chart, thermal fuse and latch circuit continuity where the history calls for it. Only then do we name a part. The point of that order is to avoid the two failure modes homeowners run into most — replacing a glowing igniter's neighbor, and replacing a control board that was reporting a fault rather than causing one. The technician quotes the repair on site before any work begins, and the repair carries a 90-day parts and labor warranty.
We cover this corridor daily. Most of these calls come from Irvine — Woodbridge, Northwood, Turtle Rock, Quail Hill, Portola Springs and the Great Park villages, where built-in wall ovens and dual-fuel ranges dominate the newer kitchens — and from Tustin and Lake Forest, where the split between older gas ranges and newer electric wall ovens is about even. We work the same day or next day down through Mission Viejo, Laguna Hills, Laguna Woods, Aliso Viejo, Laguna Niguel, Laguna Beach, Ladera Ranch, Rancho Santa Margarita, San Juan Capistrano, Dana Point and San Clemente. If you are in Irvine, oven and range repair in Irvine lists what we handle locally; elsewhere in the county, see oven and range repair.
Frequently Asked Questions
Why does my gas oven igniter glow but the oven never heats?
Because the igniter in most gas ovens does two jobs at once: it glows hot enough to light the gas, and the current it draws is what physically opens the safety gas valve. As the igniter ages its resistance rises and the current it pulls drops. It still looks bright orange, but it no longer pulls enough current to open the valve, so no gas arrives and the oven never heats. This is the single most common gas oven no-heat fault, and a glowing igniter is not proof that the igniter is good.
My electric oven is not heating but the stovetop burners work. Why?
On a freestanding electric range the surface elements and the oven are fed by the two separate legs of a 240-volt supply. If one leg is lost — a breaker that tripped on only one half, a loose connection at the range cord or terminal block — you can lose the oven while the surface elements still work on the remaining 120 volts. The other common explanation is simply a failed bake element, which does not affect the stovetop at all. Resetting the double breaker fully off and back on rules out the first cause in a minute.
Can a bad oven temperature sensor stop an oven from heating?
Yes. The sensor is a resistance probe that tells the control board how hot the cavity is. If it fails open the board usually shows an error code and refuses to heat. If it fails shorted or drifts low in resistance, the board believes the oven is already hot and shuts the heat off early, so the oven barely warms or settles far below the set temperature. A technician measures the sensor's resistance cold and compares it to the manufacturer's chart, which separates a bad sensor from a bad control board.
Is it safe to keep using an oven that will not heat?
Stop using it and call if you smell gas at any time, if you see or smell scorching, if the bake element is visibly blistered, split or arcing, if the breaker trips when the oven is switched on, or if the control panel is dead or behaving randomly. Those are not wait-and-see symptoms. An oven that simply heats slowly or runs cool is not an immediate hazard, but the underlying part is on its way out and the failure will not reverse itself.
Why did my oven stop heating right after a self-clean cycle?
Self-clean drives the cavity to roughly 850 to 900°F, and that heat is hard on everything around it. The two classic post-self-clean failures are a blown thermal fuse or thermal cutoff, which kills power to the bake circuit and sometimes to the whole control, and a door latch motor or switch that is stuck, so the board still believes the door is locked and refuses to heat. Control boards and wiring insulation also fail from that heat. It is the main reason we advise running self-clean well before any occasion you actually need the oven for.
Should I replace my oven or repair it if it is not heating?
Most no-heat faults are single-part repairs — an igniter, a bake element, a temperature sensor, a thermal fuse — on a machine whose cavity, door and cabinet are perfectly good, so repair is usually the sensible call. The calculation shifts when the failure is a control board on an older unit, when more than one major part has failed at the same time, or when the range is well past its expected service life and has been drifting for a while. Our technician quotes the repair on site before any work begins, so you can make that decision with the real number in front of you.
Related Pages
- Oven & Range Repair in Irvine
- Oven & Range Repair in Orange County
- How to Prepare Your Oven for Thanksgiving
- Symptom Index — What's Wrong With My Appliance?
- Dryer Not Heating? Elements, Igniters and the 240V Breaker Trap
- Before the Technician Arrives
- Maintenance That Prevents Most Repairs
- Repair or Replace?
- Understanding Your Warranty
- Refrigerator Not Cooling — 10 Causes
- Irvine · Tustin · Lake Forest · Mission Viejo · Laguna Hills · Aliso Viejo · Dana Point · San Clemente