
Oven Temperature Problems That Can Ruin Thanksgiving Dinner: Uneven Heat, Slow Preheat, Wrong Temperature
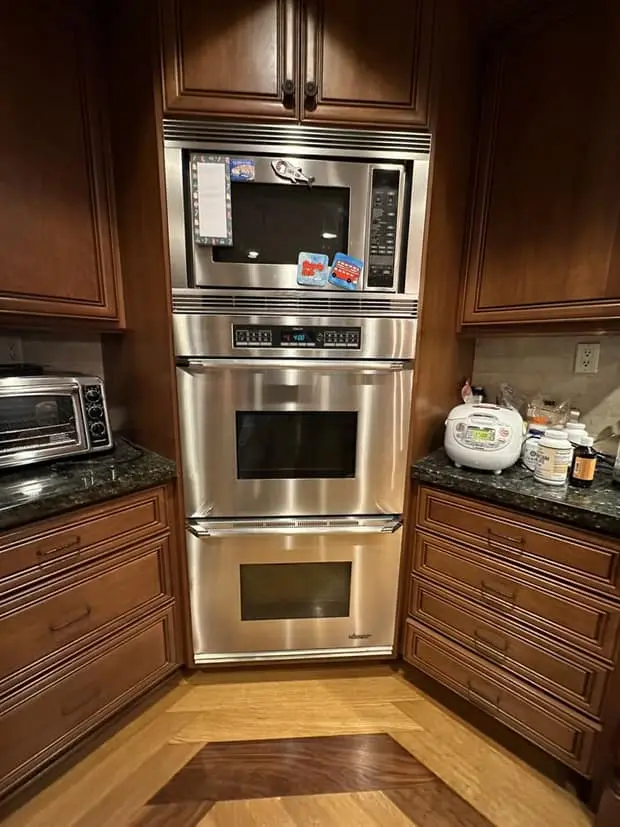
An oven that will not turn on ruins your evening. An oven that turns on and lies to you ruins Thanksgiving. The turkey reads done an hour early and is raw at the thigh, the pies set on one side, the rolls burn on the bottom rack while the casserole on top is still pale. Nobody suspects the appliance, because the display says 350°F and the oven feels hot.
This guide is about that second failure. Not the oven that produces no heat, which is a different problem with a different short list, but the oven that produces the wrong heat: cool, uneven, slow to arrive or swinging wildly through a long bake. We work on gas and electric ovens, wall ovens, double ovens and ranges across Irvine, Tustin and Lake Forest and down the rest of the South Orange County corridor, and October is when we would rather see these calls. In late November they turn into emergencies.
Which temperature problem do you actually have?
Put your complaint in one of these boxes before you touch anything. Each one has a different short list, and mixing them up is how people replace the wrong part.
- Runs cool or runs hot across the board. Everything takes longer than the recipe says, or everything comes out overdone. The error is consistent, which is the easiest case.
- Uneven heat. Front to back, side to side, or top rack against bottom rack. One pan browns, its twin does not.
- Slow preheat. The oven gets there eventually, but it takes twice as long as it used to.
- Swings during a long bake. It hits the setting and then wanders, 60 or 80°F either side, so anything in there for two hours cooks unpredictably.
Then note two more details. Does broil still behave normally? And on a double oven, does the second cavity have the same problem? Broil working while bake runs cool points straight at the bake circuit. One cavity misbehaving while the other is fine rules out the house wiring and most of the shared control hardware in a single sentence.
Measure it properly, because guessing here is useless
You cannot diagnose a temperature complaint by feel, and you cannot do it with the oven's own display, because the display is reporting what the suspect part believes. Get an independent oven thermometer. The dial type that hangs on a rack is fine for this, and a probe thermometer with a wire lead through the door gasket is better because you can read it without opening anything.
Here is the test we use, and it takes about fifty minutes of mostly waiting.
- Empty the oven except for one rack in the center position. Put the thermometer in the middle of that rack, not touching a wall, not on the floor of the cavity.
- Set the oven to 350°F on standard bake. Not convection, not a preset.
- Ignore the preheat tone completely. Wait a full twenty minutes past it before reading anything. The walls, racks and cavity floor need that time to absorb heat, and this is where most home testing goes wrong.
- Now read the thermometer every five minutes for thirty minutes. Write the numbers down. You want six readings.
- Average them. That average is your oven's real temperature. Then look at the highest and lowest readings, because the spread between them matters as much as the average.
A healthy oven cycles. It should read roughly 20 to 30°F above the setting at the top of a cycle and the same below at the bottom, with an average close to 350°F. Two things tell you something is wrong: an average that is off by more than 25°F, or a spread wider than about 60°F total. Those are two different faults, and the test separates them.
If you suspect uneven heat rather than a wrong average, run the test again with the thermometer moved. Left rear, then right front, then the lower rack. Twenty minutes of stabilizing each time. Tedious, but it turns "it browns funny" into a map, and a map is something a technician can act on before opening a single panel.
Symptoms and what they point to
| What you observe | Most likely causes |
|---|---|
| Average is 15 to 25°F off, steady, spread is normal | Normal drift. Use the calibration offset in the settings menu (5) |
| Average is 40°F or more off, steady | Temperature sensor drifted out of range (6), or a calibration offset someone already set and forgot (5) |
| Average was fine three months ago, worse now, getting worse | Sensor drifting progressively (6), or a heat source fading (7, 8) |
| Spread of 75°F or more between high and low readings | Sensor reading erratically (6), control board relay (9), poor sensor placement after a previous repair |
| Slow to preheat, gas oven | Weak hot-surface igniter, the classic (7) |
| Slow to preheat, electric oven | Bake element failing (8), oven heating on broil element only, lost 240V leg |
| Bottoms burn, tops stay pale | Bake element running with no convection circulation (10), rack too low, dark or heavy pan |
| Tops brown, bottoms undercooked | Bake element weak or partly open (8), rack too high, foil or a stone blocking floor heat (11) |
| Same side of the cavity always browns faster | Convection fan slowed or stopped (10), element failing at one end (8), warped cavity floor, door not sealing evenly (12) |
| Oven recovers very slowly after the door opens | Weak heat source (7, 8), door gasket leaking (12), heavy load with no recovery time |
| Convection results worse than standard bake | Convection fan or its motor (10), convection element on a true-convection oven, or the 25°F conversion applied twice (10) |
| Error code with a temperature complaint | Sensor open or shorted (6), control board (9). Read the code, it is diagnostic |
| Started right after a self-clean cycle | Heat damage to sensor, wiring or board (6, 9), thermal cutoff, warped door seal (12) |
5. The calibration offset: what it fixes and what it hides
Nearly every oven built in the last twenty years has a calibration adjustment buried in the settings menu, usually reachable by holding the Bake button for several seconds or through a Settings or Options screen. It lets you shift the oven by a fixed amount, typically up to 35°F in either direction on residential models.
Use it when your measured average is steadily off by a modest amount and the spread is normal. That is what it is for. Ovens drift a little with age and this is the intended correction.
Do not use it to chase a moving target. The offset applies one fixed number to whatever the sensor reports, so it only works if the sensor's error is also fixed. A drifting sensor typically reads further off at 450°F than at 325°F, which means the offset you set for pie season will be wrong for the roast. If you have already adjusted the offset once and the oven has gone off again, that is your answer: stop adjusting and get the sensor checked. We have opened ovens where someone had dialed in the full 35°F and the oven was still 40°F cool, which by then is two problems stacked on each other.
One more thing worth checking before you blame the appliance. If you bought the house recently or someone else cooks in that kitchen, look at the current offset value first. A previous owner's forgotten adjustment explains a surprising number of "this oven has always been off" complaints.
6. The temperature sensor, and why it drifts
The sensor is a thin metal probe that pokes into the upper rear of the cavity. Inside it is a resistance element whose resistance climbs predictably as it gets hotter, and the control board converts that resistance into a temperature. On most residential ovens the sensor reads close to 1080 to 1100 ohms at room temperature and rises roughly 2 ohms per degree Fahrenheit from there, though the exact figures vary by manufacturer and the model chart is what counts.
When that relationship shifts, the board is not lying to you on purpose. It is faithfully reporting a bad number. A sensor reading high makes the board think the oven is hotter than it is, so it cuts heat early and the cavity runs cool. A sensor reading low does the opposite and the oven overshoots. A sensor with an intermittent internal connection, common after years of thermal cycling or after a self-clean cycle, produces the wide erratic swings that show up as an enormous spread in your thirty-minute test.
Two failure modes are worth separating. A sensor that has failed outright usually throws an error code and the oven refuses to heat, which puts you in no-heat territory instead. A sensor that has merely drifted throws no code at all, which is why this problem goes unnoticed for years and then surprises somebody on a holiday.
Checking it means measuring resistance cold at the connector and comparing against the manufacturer's chart, then confirming the sensor is seated correctly and not touching the cavity wall. A sensor pushed too far in or resting against metal reads the wall rather than the air. We have found that twice on units that had been serviced before by someone else.
7. Gas ovens: the igniter decides your temperature
On a standard gas oven the hot-surface igniter and the safety gas valve are wired in series, and the current the igniter draws is what physically opens the valve. As the igniter ages its resistance rises, the current drops, and the valve takes longer and longer to open. The igniter still glows a convincing orange the whole time.
People think of this as a no-heat fault, and eventually it becomes one. But long before that it is a temperature fault, and this is the part most homeowners miss. A valve that takes three minutes to open instead of forty seconds means the burner is off for three minutes at the start of every heating cycle. The oven still reaches 350°F, so nothing looks broken, but the cavity spends far more time below the setting than above it, the average sits low, and the recovery after you open the door to baste is dismal.
You can time this safely without tools. Set the oven to 350°F, look through the bottom vent or the broiler drawer opening, and watch for the igniter to start glowing. From that moment, a healthy oven lights the burner within about 30 to 90 seconds. Three, four or five minutes means the igniter is on borrowed time even if dinner still comes out. Measuring the actual current draw on the live circuit is a technician's job and the only definitive test, but the stopwatch gets you most of the way there for free.
Gas supply pressure matters too, and it is the other half of this conversation. A partly closed shutoff valve behind the range, or a regulator problem, gives you a small lazy flame and an oven that never quite performs. That is not a homeowner check. Do not adjust a gas regulator or a burner air shutter yourself.
8. Electric ovens: elements fail slowly before they fail loudly
The bake element is a sheathed resistance heater. When it fails completely you get no bake heat and an obvious problem. Before that, two subtler things happen.
The first is an element that has developed a hot spot but has not yet opened. It still works, it still glows, but its output has fallen and the section around the damage runs differently from the rest. That produces uneven results along the length of the pan and a cavity that is slow to reach temperature. If you can see the element, look for blistering, a split, or a section that glows noticeably brighter or duller than the rest. A blistered or split element should take the oven out of service until it is replaced.
The second is more confusing: on many modern ranges the bake element is hidden beneath the cavity floor, where you cannot see it at all. Those fail the same way, and the only symptom is a cavity that takes forever to come up and never quite holds. Do not conclude your oven has no bake element because you cannot see one.
There is also a control-side version of this. Some ovens run both the bake and broil elements together during preheat and then drop to bake alone. If the broil element or its relay has failed, the oven preheats at half its normal rate while baking normally afterward, which is a genuinely puzzling symptom until you know to look for it.
9. The control board, and why it is rarely the first answer
The board switches the heat sources through relays and decides when to call for heat based on the sensor. A relay that has welded or worn produces long overshoots or heat that will not shut off. A board that has lost its calibration data after a power event can run consistently off. Both happen.
They are also the most over-diagnosed parts in this category. A board reporting a sensor problem is doing its job, not failing at it, and replacing it changes nothing. We measure the sensor and the elements first, every time, and only conclude board when the inputs check good and the outputs do not match them. In Irvine and Tustin, where a lot of the built-in wall ovens are ten to fifteen years old, a board is also the repair most likely to run into parts availability, which is one more argument for testing in October.
10. Convection: the fan that is supposed to even things out
Convection exists to solve the uneven heat problem, so when the fan is the thing that has failed, the symptom is the one it was meant to prevent. A convection motor that has slowed, a fan blade loose on its shaft, or a motor that runs but with a worn bearing all reduce circulation, and you get exactly the front-to-back browning difference you bought a convection oven to avoid.
Listen for it. A convection fan should be audible and steady. Intermittent, rattling, or silent when the mode is on tells you enough to mention on the phone.
Two non-mechanical convection issues are worth ruling out first, because they are free. Some ovens automatically reduce the set temperature by 25°F in convection mode, and if you also reduce the recipe temperature by 25°F, you are now baking 50°F cool and blaming the appliance. Check your manual for whether the conversion is automatic. And true convection with a third element behind the fan behaves differently from plain convection that just circulates air, so results that shifted after you replaced an old oven with a new one may be the oven working correctly and the recipe needing adjustment.
11. Before you blame the oven: loading, pans and foil
A fair share of the uneven-heat calls we take turn out to be physics rather than failure, and it would be dishonest not to say so plainly. Rule these out before anything else.
- Foil on the cavity floor. It blocks the heat path and reflects it back at the element, which both starves the top of the oven and can overheat the element itself. Most manufacturers prohibit it. Use a sheet pan on a lower rack to catch drips instead.
- Pans too close to the walls. Leave at least an inch and a half around every pan and between pans. Air has to move past them.
- Two pans on one rack. Stagger them across two racks instead, and swap positions halfway through.
- Dark or warped pans. Dark metal absorbs more radiant heat and browns bottoms faster. A warped pan sits unevenly and cooks unevenly for entirely mechanical reasons.
- A baking stone left in permanently. It stores heat, slows preheat, and changes how the bottom of the cavity behaves. Fine when you want it, not fine when you forgot it is in there.
- Opening the door. Every opening dumps a large fraction of the cavity heat. A healthy oven recovers in a few minutes. An oven with a weak heat source does not, which is why the holiday load exposes a problem that ordinary weeknight cooking hides.
Test with a single centered pan before deciding the oven is at fault. If the unevenness disappears, you have your answer and it did not cost anything.
12. The door, the gasket and the hinges
Heat leaving the cavity is a temperature problem even when every heating part is perfect. The door gasket is the usual suspect. Run your hand a few inches from the closed door around the whole perimeter while the oven is hot, and feel for a stream of warm air, most often along the top edge or a top corner. Then look at the gasket itself: it should be soft and springy the whole way around, not flattened, hardened, torn or missing a section.
Hinges matter as much and get blamed less. Oven door hinges are under heavy spring tension, and when they weaken the door hangs slightly open at the top even though it latches at the bottom. You can sometimes see the gap, and you can usually feel it as a door that does not pull itself shut the last half inch the way it used to. A door that no longer closes square will never hold a stable temperature no matter what else you replace.
Do not attempt to remove or adjust oven door hinges. The springs in them are strong enough to cause a serious injury, and door removal is a specific procedure per model. Feel for the leak, look at the gasket, then tell us what you found.
What only a technician should do
Everything above is either observation, measurement with a thermometer, or a settings change. That is genuinely most of the diagnosis. Past that line the work involves live 120 or 240 volt circuits, gas components or spring-loaded assemblies.
- Measuring igniter current on a live gas oven circuit, which is the only definitive igniter test.
- Any work on the gas supply, shutoff, regulator or safety valve.
- Resistance testing the temperature sensor against the model chart and checking its placement.
- Testing elements and control board relays for continuity and correct switching.
- Removing the rear cavity panel on a wall oven or built-in to reach the hidden element, sensor or convection assembly.
- Door hinge and gasket replacement, and squaring the door afterward.
- Anything involving a blistered or arcing element, scorching, or a breaker that trips.
When to stop cooking and call
- You smell gas at any point. Leave the house first and call SoCalGas from outside.
- The breaker trips when the oven runs, or trips repeatedly.
- You see arcing, sparking, scorch marks or a blistered or split element.
- There is a burning or electrical smell that is not food.
- The oven will not shut off, or keeps heating past the setting with no sign of cycling.
- A gas burner flame is mostly yellow and sooty rather than blue.
- The control panel behaves randomly or shows codes that come and go.
A timeline that actually works before a holiday
The reason this article exists in early October rather than mid November is parts. A sensor, an igniter or an element is a straightforward repair when the part is in stock or three days out. The same repair on the Monday of Thanksgiving week depends entirely on luck.
- Three to four weeks out. Run the thermometer test described above. Twenty minutes stabilizing, thirty minutes of readings, write the numbers down.
- Same day. Check the door gasket by hand, look at the current calibration offset, and listen to the convection fan.
- If the average is within 25°F and the spread is normal, adjust the offset and retest once. You are done.
- If it is not, call while there is still time to order a part. Tell us the six readings. That single piece of information often decides the diagnosis before we arrive.
- Two weeks out. If you plan to run self-clean, run it now and never later. High-heat cleaning is the single most common cause of a working oven becoming a broken one, and you want any fallout to surface with time to spare. Our Thanksgiving oven checklist covers the rest of the pre-holiday run-through.
- The week of. Do a short confirmation preheat. No experiments, no cleaning cycles, no new equipment.
What we do on the call
A temperature complaint follows a set order. We confirm the symptom and read any stored codes, verify the supply at the appliance, then measure: sensor resistance against the model chart, element continuity and draw, igniter current on gas, relay switching on the board, and a stabilized cavity reading of our own to compare with the control's. Only then do we name a part. That order exists to avoid the two mistakes this category invites, which are replacing a board that was correctly reporting a bad sensor, and topping up a calibration offset that is already masking a real fault. The technician quotes the repair on site before any work begins, and the repair carries a 90-day parts and labor warranty.
Most of these calls come from Irvine, where built-in wall ovens and dual-fuel ranges fill the kitchens in Woodbridge, Northwood, Turtle Rock, Quail Hill, Portola Springs and the Great Park villages, and where a ten-year-old built-in is the most common unit we see. Tustin and Lake Forest run closer to an even split between older gas ranges and newer electric wall ovens. We work the same day or next day down through Mission Viejo, Laguna Hills, Laguna Woods, Aliso Viejo, Laguna Niguel, Laguna Beach, Ladera Ranch, Rancho Santa Margarita, San Juan Capistrano, Dana Point and San Clemente. If you are in Irvine, oven and range repair in Irvine lists what we handle locally. Elsewhere in the corridor, see oven and range repair.
Frequently Asked Questions
How much can an oven be off before it needs repair?
Most manufacturers consider the oven in spec if the average cavity temperature is within about 25°F of the setting, measured after the oven has fully stabilized. Anything inside that band is usually a calibration adjustment, not a repair. Past roughly 35 to 50°F off, or if the oven cannot hold a steady average at all, a part is failing and the offset setting will only mask it for a while. Also watch the swing. A healthy oven cycles about 20 to 30°F above and below the setting. Swings of 75°F or more mean the sensor or the control is not doing its job.
Why does my oven brown one side of the pan and not the other?
Start with the pan, not the oven. A pan within an inch or two of a cavity wall, foil on the oven floor, or two sheet pans stacked on the same rack will all brown unevenly in a perfectly healthy oven. If the pattern stays after you center a single pan on the middle rack and rotate it halfway through, then look at the appliance: a bake element failing on one leg, a convection fan that has slowed or stopped, a warped cavity floor, or a door that no longer seals evenly across the top. Uneven browning that always shows on the same side of the cavity points to the appliance. Uneven browning that moves when you move the pan does not.
Does the oven calibration setting fix a bad temperature sensor?
No. The calibration offset just tells the control board to add or subtract a fixed number of degrees from whatever the sensor reports. It corrects a steady error. A failing sensor drifts, and it usually drifts more at high temperature than at low, so the offset you dial in for a 350°F bake will be wrong at 450°F and wrong again next month. If you find yourself increasing the offset a second time, stop adjusting and have the sensor resistance measured against the model chart.
My oven preheats much slower than it used to. Is that a temperature problem?
It is the same problem caught early. Slow preheat means the oven is producing less heat per minute than it was designed to. On a gas oven that is nearly always a hot-surface igniter whose resistance has climbed, so it draws less current and takes longer to open the safety gas valve. On an electric oven it is usually a bake element on its way out, or the oven running on one heat source when it should be using two. An oven that used to reach 350°F in ten to twelve minutes and now takes twenty-five will also struggle to recover after you open the door, which is exactly what a holiday asks it to do.
Should I trust the oven's built-in preheat tone?
Not for baking. On many ovens the preheat signal fires when the sensor near the top of the cavity first touches the target, before the racks, walls and cavity floor have absorbed their share of the heat. Put a dish in at that moment and the real temperature around it can be 25 to 50°F low for the first ten minutes. For anything sensitive, especially pies and breads, give the oven another ten to fifteen minutes after the tone. This is also why a thermometer reading taken right at the tone tells you very little about whether your oven is accurate.
Can I fix an oven temperature problem myself before Thanksgiving?
You can do the measuring, and the measuring is most of the diagnosis. Put an oven thermometer on the center rack, run a full stabilized test at 350°F, log readings for half an hour, and check the door seal and hinges. If the average is within about 25°F you can adjust the calibration offset in the settings menu and be done. Beyond that the work involves live voltage, resistance testing against a model chart, or gas components, and those belong to a technician. Do the test two to three weeks out, not on the Tuesday before the holiday, because parts availability is the thing that turns a small repair into a ruined dinner.
Related Pages
- Oven & Range Repair in Irvine
- Oven & Range Repair in Orange County
- Oven Not Heating? Igniter, Element, Sensor and Board
- How to Prepare Your Oven for Thanksgiving
- Symptom Index: What's Wrong With My Appliance?
- Before the Technician Arrives
- Maintenance That Prevents Most Repairs
- Repair or Replace?
- Understanding Your Warranty
- Refrigerator Maintenance Checklist
- Irvine · Tustin · Lake Forest · Mission Viejo · Laguna Hills · Aliso Viejo · Dana Point · San Clemente