
KitchenAid Built-In Refrigerator Problems: What Fails on 36, 42 and 48 Inch Units
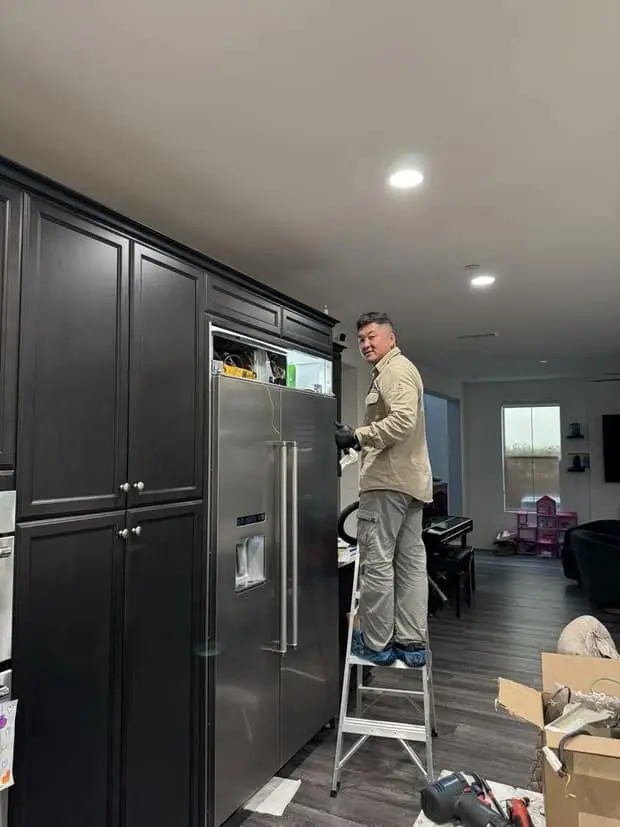
A KitchenAid built-in is a different machine from the KitchenAid freestanding refrigerator in the garage, even when the badge is the same. It is sized to the cabinet opening, trimmed flush with the doors around it, often wearing custom panels, and it has to live its whole life in a box with one opening for air. That changes what breaks and the order it breaks in. This guide covers the problems we actually get called for on 36, 42 and 48 inch built-in and panel-ready units in Irvine, Tustin and Lake Forest kitchens: doors and hinges, grille and ventilation, ice, water, noise, lights, drawers and resets. If your unit has simply stopped getting cold, that is a different diagnostic path and it is laid out in our guide to a KitchenAid refrigerator not cooling.
First, which built-in do you have?
Three numbers decide most of the conversation: the width, the configuration, and whether the doors are factory stainless or panel-ready. KitchenAid built-ins run 36, 42 and 48 inches wide in side-by-side form, plus 36 inch built-in French-door units and integrated column refrigerators and freezers that disappear into the cabinetry entirely. A 48 inch side-by-side carries two tall, heavy doors and the most hardware. A panel-ready unit carries whatever the cabinet shop built, and that panel is often heavier than the stainless door the hinge was engineered around.
Before you call anyone, find the model and serial plate. On built-ins it is usually inside the fresh-food compartment along the upper side wall, sometimes behind the grille. Those numbers decide which gasket, which hinge kit, which ice maker and which board. Reading them to us on the phone is the difference between one visit and two.
What the symptom tells you
| What you observe | Most likely causes |
|---|---|
| Door looks slightly low or tilted against the neighboring cabinet | Hinge settle under panel weight, loose panel bracket, worn hinge cam |
| Condensation or sweating around the door frame, gasket feels damp | Gasket not sealing at the top corner, door ajar, hardened gasket |
| Unit runs almost constantly, grille air feels hot | Dust-packed condenser, blocked grille, condenser fan stopped |
| Water dispenses, ice maker produces nothing | Frozen fill tube, ice maker module or thermostat, bail arm or sensor off, ice side of the water valve |
| Ice is small, hollow or slow | Low water pressure, clogged filter, partially restricted fill tube |
| Water tastes off or dispenses slowly | Filter past due, air in the line after a filter change, kinked line at the hinge |
| Buzzing for several seconds at intervals | Water inlet valve energizing with the supply closed or restricted |
| Rhythmic ticking or scraping from behind the freezer wall | Evaporator fan blade hitting frost, failing fan bearing |
| Water on the floor in front of the unit | Blocked defrost drain, dispenser line, filter head leak, ice maker supply fitting |
| Touch panel will not respond | Control lock engaged, showroom mode, failed panel or board |
| Interior lights out, cooling normal | LED module or its driver, door switch |
Doors and hinges: the number one built-in problem
This is where most built-in service calls really start, even the ones that come in as something else. A built-in door is tall and heavy. Add a custom panel and it gets heavier. Over several years of being opened a dozen times a day, the hinge and the door settle a few millimeters, and because the unit is trimmed into cabinetry, you notice the misalignment against the cabinet line long before you notice the cooling.
The cooling is what matters though. A door that has dropped is a door whose gasket has lifted off the frame at one corner, usually the top one on the handle side. Warm room air walks in all day. The compressor runs longer, the evaporator frosts faster than the defrost cycle can clear it, and the fresh-food side starts drifting warm in the afternoon. People blame the weather. It is the door.
What to check: close the door on a dollar bill at the top corner, the middle and the bottom on both sides. If it slides out freely at one spot and grips at the others, that spot is your leak. Wipe the gasket with warm soapy water first, since sticky residue is the most common reason a good gasket will not seat. Look along the gasket for a corner pulled out of its channel, a hardened section that no longer springs back, or a tear.
What we do: built-in doors have real adjustment, at the hinge and, on panel-ready units, at the panel brackets. A door that settled can usually be brought back into line and the gasket brought back into contact. If the hinge cam or the closing mechanism is worn rather than loose, adjustment will not hold, and the hardware gets replaced. One note worth saying out loud: do not keep tightening panel screws into the same holes to pull a sagging door up. On a wood panel those holes strip, and then a simple adjustment turns into a panel repair.
The grille is the entire ventilation system
A freestanding refrigerator pulls air from the room across a coil under or behind it. A built-in cannot. It sits in a sealed cabinet opening with one path in and out, and on KitchenAid built-ins that path is a grille, at the top of the cabinet on many models and at the toe on others. Check which one your unit has, because people often clean the wrong end for years.
What collects there is not just household dust. It is pet hair, cooking oil that drifts off the range and makes the dust stick, and in newer or remodeled homes the very fine construction dust that keeps circulating for months after the work is done. The coil turns into a felt mat. Heat that should leave the cabinet stays in it, head pressure rises, the compressor runs hot and long, and cooling quietly falls off. On a 48 inch unit with two compartments to hold, that shows up as one side drifting before the other.
What to check: turn the unit off at the dedicated breaker, pull the grille, and look. If you can vacuum the coil face with a crevice tool and a long coil brush, do it, working along the fins rather than across them so you do not fold them over. Vacuum the fan blade while you are in there. Do not move hoses or wiring to get deeper, and skip the compressed air, which mostly drives dust further into the coil. If the coil is matted solid or greasy, leave it for a service visit.
I would put this on the calendar once a year in a built-in, not the two to three years people quote for freestanding units. The cabinet gives it nowhere to dump heat, so the same amount of dust costs more.
Ice makers: the part of a built-in that fails the most
On every premium built-in we service, the ice maker generates more calls than anything except doors. The useful first question is whether the water dispenser still works. If it pours, the supply line, the shutoff and most of the valve are healthy, and you can stop suspecting the house plumbing.
From there the common failures are short list. The fill tube, the small tube that squirts water into the mold, frosts over and blocks. That is the one we find most. A defrost or airflow issue is usually behind it, or a slow leak at the valve dribbling water that freezes between cycles. The ice maker module itself can fail, along with its thermostat or the sensor and bail arm that tell it the bin is full. A bail arm knocked into the up position by a bag of frozen food will stop production completely, and the fix takes one second once you see it.
Then there is water quality. Orange County tap water is hard, and scale builds inside the mold, the valve and the filter head. Hard-water ice tends to come out small, cloudy and slow, and the mold releases it badly, which looks like a jammed ejector. If your home has a reverse osmosis system feeding the refrigerator, pressure is worth checking, because the pressure downstream of an RO tank is often lower than what a refrigerator ice maker expects, and the result is thin, hollow cubes.
What to check: bail arm down, bin seated, filter not past due, nothing blocking the ice chute. If you can see a plug of ice at the fill tube, a hair dryer on low from a safe distance will thaw it, but understand that is a test, not a repair. If it blocks again within a few weeks, the reason it froze has not been fixed. There is more on the symptom in our ice maker not working guide.
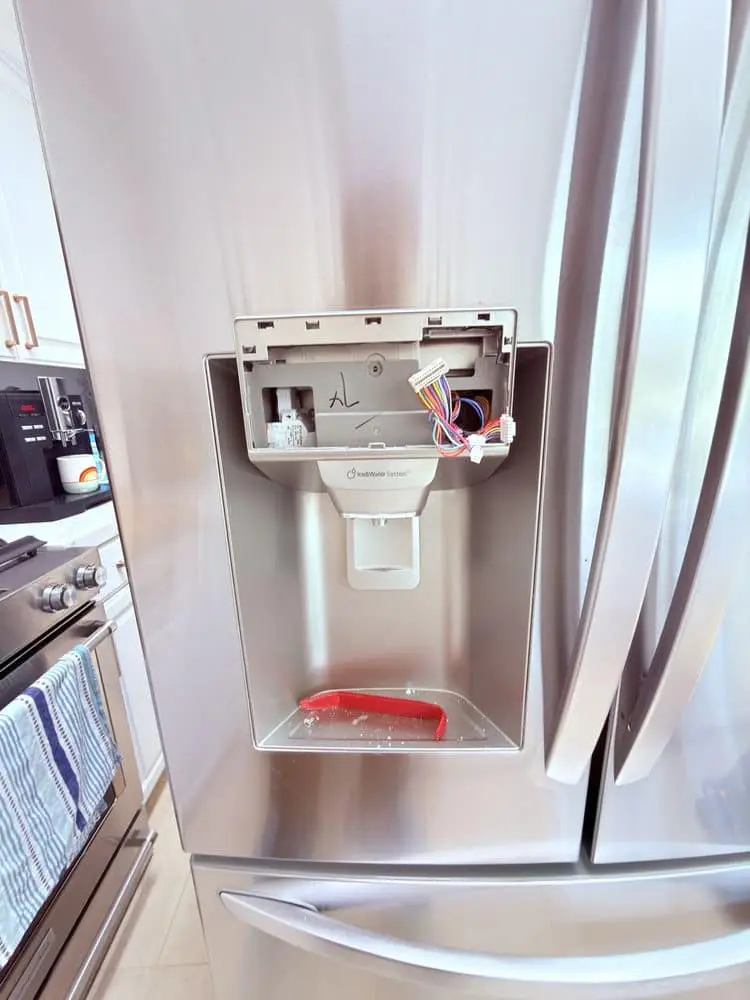
Water: filters, dispensers and the leak you find too late
The water filter is the maintenance item people skip. A filter well past its interval restricts flow, which shows up as a dispenser that trickles and ice that gets small at the same time. Change it on schedule, roughly every six months in a normal household, and run a few quarts through afterward to clear the air. That sputtering right after a filter change is normal and should stop within a gallon or two.
Leaks are the part worth taking seriously, because a built-in sits over finished flooring and you often do not see water until it has been traveling for a while. Four places produce most of them. The defrost drain, blocked by sludge or frozen at the tube, so meltwater runs out the front instead of into the pan. The filter head, which can weep after a cartridge change that did not seat. The saddle valve or compression fitting on the household supply. And the dispenser line inside the door. Any water you find in front of a built-in is worth tracing the same week. Hardwood does not forgive a slow drip. Our refrigerator leaking water guide walks through isolating which one it is.
Noises and what each one means
Built-ins are quiet machines, so a new sound stands out. A buzz lasting several seconds at intervals is almost always the water inlet valve trying to fill with the supply shut off or restricted, and it will repeat every ice cycle until the water is restored. A rhythmic tick or scrape from behind the freezer back wall is the evaporator fan blade catching frost, which means the defrost system deserves attention before the fan motor gets blamed. A rattle or hum from the grille end is the condenser fan, often with debris in the blade. Popping and light cracking as the cabinet changes temperature is normal expansion, and so is the gurgle of refrigerant after the compressor stops.
The noise worth stopping for is a loud hum that ends with a click every few minutes and no cooling. That is a compressor trying to start and its overload cutting it off. Running the unit in that state for days does not help anything. Our guide to refrigerator noises breaks the sounds down further.
Controls, resets and the two modes that fake a dead refrigerator
There is no reset button hidden behind the grille, whatever a forum told you. Before you cycle power, rule out two things. Control lock, which makes the whole touch panel ignore you and is usually cleared by holding the lock pad for a few seconds. And showroom or demo mode, which keeps the lights and the display looking perfectly normal while the cooling never runs. Demo mode gets left on after a delivery more often than you would think, and it is the reason for the occasional call where a brand new built-in has never gotten cold. The sequence to exit it is model specific and it is printed in the owner manual.
If both are clear, a power cycle is reasonable: breaker off, wait about five minutes, breaker on. Treat the result as information. If the symptom is gone for good, fine. If it returns within days, the reset only cleared a fault code and the underlying part is still failing, and that is what we come out to find.
Lights, drawers and the small stuff
LED interior lighting on a built-in is a module, not a bulb you unscrew, and when a section goes dark it is usually the module or its driver rather than anything you can swap at the hardware store. One warning: if the lights stay on with the door closed, the door switch has failed, and on many models that switch also controls the evaporator fan. The compartment will warm up and the light housing can get hot enough to damage the trim. Treat that one as urgent rather than cosmetic.
Freezer and crisper drawers on built-ins ride on glides that collect spilled sugar and ice. A drawer that no longer runs smoothly is often just a glide that needs cleaning, but a freezer drawer on a French-door built-in that will not fully close is holding the seal open all night, which brings you right back to frost and run time. KitchenAid built-ins also carry an air filter as part of the Preserva food care system, separate from the water filter, and it gets forgotten completely. It will not break the refrigerator. It just means the odor control stopped working a year ago.
What you can safely check yourself, in order
- Verify actual temperature with a real thermometer in each compartment, around 37°F in the fresh-food side and 0°F in the freezer, rather than trusting the display.
- Rule out control lock and showroom mode on the panel.
- Dollar-bill test the gasket at the top, middle and bottom of every door, and clean the gasket before judging it.
- Look at the door alignment against the neighboring cabinets, then check whether the doors swing shut on their own.
- Find your grille, pull it with the breaker off, and vacuum the condenser face and the fan blade.
- Check the water filter date and the ice maker bail arm, and confirm nothing is blocking the ice chute.
- Listen with the doors shut for the condenser fan, and with the door switch held for the evaporator fan.
- Look at the freezer back wall for heavy frost, which points at the defrost system.
What only a technician should do
Anything behind the evaporator panel, any hinge or panel hardware that needs more than a known adjustment, defrost circuit testing, thermistor resistance measured against the manufacturer chart, board diagnostics, water valve and dispenser work in a live door, and all sealed-system work. The sealed system is the refrigerant loop, and it needs EPA certification, recovery equipment, brazing and a vacuum pump. There is no such thing as topping up a refrigerator with refrigerant. If it is low, it is leaking, and the leak gets found first. That is the work covered on our sealed-system and compressor repair page.
A built-in adds one more reason to stop early. The unit is anchored into cabinetry, and pulling it out is a procedure, not a shove. Dragging a 48 inch built-in across a floor to reach the back damages the flooring, the trim and sometimes the unit, and most of the time the repair did not require it.
Keeping a KitchenAid built-in out of trouble
- Clean the condenser once a year. Twice if you have pets, cook heavily, or the house has had recent construction.
- Wipe the gaskets a couple of times a year and look at door alignment while you do it. Catching a settled door early is a five-minute adjustment instead of a frost problem.
- Change the water filter about every six months, and the air filter on the schedule in the manual.
- Keep the grille clear. Do not stack anything against a toe grille, and do not let a cabinet valance block a top grille.
- Do not block the interior vents with trays or boxes pressed to the back wall.
- Keep a thermometer inside. Noticing 42°F early is a door or a coil. Noticing 55°F a month later is spoiled food and a compressor that has been working overtime.
- After a power outage, confirm the controls did not come back in a default or demo state.
The complete schedule is in our refrigerator maintenance checklist, and we do maintenance visits on built-in refrigeration as standalone appointments, not only when something has already failed.
Repair or replace a built-in?
Built-ins break the usual rule. With a freestanding refrigerator past about twelve years, a big repair is a fair argument for replacement. With a built-in, replacement means matching an opening, matching trim, often ordering new panels and bringing in a cabinet person. Parts for the built-in line also stay available much longer than for entry-level models. So doors, hinges, gaskets, fans, defrost parts, ice makers, valves and boards are worth doing on a built-in at an age where we would hesitate on a basic unit. The honest exception is a sealed-system failure on an old cabinet, and even there you should have a real number from a technician before you start pricing a replacement with cabinetry attached. Our repair or replace guide goes through the rest of the math.
Where we work and how to reach us
We service KitchenAid built-ins across Irvine first, where most of our built-in work is, then Tustin and Lake Forest, and on down the corridor through Mission Viejo, Laguna Hills, Aliso Viejo, Laguna Niguel, Ladera Ranch, Rancho Santa Margarita and San Juan Capistrano to Dana Point and San Clemente. We provide professional KitchenAid repair, and we see these units constantly alongside the other built-in brands in the same kitchens.
When you call, have the model and serial number ready and tell us the width, whether the doors are panel-ready, and what the grille air feels like. That one sentence usually decides which parts ride out on the truck. Every repair carries a 90-day parts and labor warranty, and the technician quotes the work on site before anything starts. We are 5.0 on Yelp if you want to see how these visits go. Call (949) 267-7771.
Frequently Asked Questions
What fails most often on a KitchenAid built-in refrigerator?
Doors and ventilation, in that order. Built-in doors are heavy, and on panel-ready units a custom wood or stainless panel adds more weight than the hinge was carrying on the showroom floor. Over a few years the door settles, the top corner of the gasket stops sealing, and the unit runs longer and frosts faster. Right behind that is the grille. A built-in breathes through a grille instead of an open back, and when that grille and the condenser behind it load up with dust, the compartment runs warm. Ice makers, fill tubes, water filters and dispenser valves come next, then fans, defrost parts and control boards.
Is there a reset for a KitchenAid built-in refrigerator?
There is no hidden reset button. A power cycle is the closest thing: switch the dedicated breaker off, wait about five minutes, then switch it back on. Before you do that, rule out the two modes that look like a dead refrigerator. Control lock freezes the touch panel, and showroom or demo mode keeps the lights and the display alive while the compressor stays off. Both are cleared from the control panel, and the sequence is printed in the owner manual for your model. If a power cycle fixes the symptom and it returns within days, something failed and the reset only hid it for a while.
Why does my KitchenAid built-in ice maker stop making ice but the water dispenser still works?
Because they share a water valve but not a path. If water still comes out of the dispenser, the supply line and most of the valve are fine, so the problem is usually downstream in the ice circuit: a frozen fill tube, the ice maker module or its thermostat, a bail arm or sensor stuck in the off position, or the ice maker half of a dual water valve. A fill tube that frosts over and blocks is the single most common one we find. It needs to be thawed and the reason it froze needs fixing, or it will block again in a few weeks.
How do I clean the condenser on a KitchenAid built-in refrigerator?
Find the grille first, because built-ins vary. Many KitchenAid built-ins pull air through a grille at the top of the cabinet, others use a toe grille at the floor. Turn the unit off at the breaker, remove the grille (usually a few screws or clips), and vacuum the coil face with a crevice tool and a long coil brush. Work with the fins, not across them, so you do not bend them. Do not pull hoses or wiring to reach deeper, and do not use a pressure washer or compressed air that drives dust further into the coil. If the coil is matted solid or greasy, it needs a proper cleaning on a service visit.
My KitchenAid built-in doors no longer line up with the cabinets. Can that be adjusted?
Usually yes. Built-in doors have hinge adjustment, and panel-ready models also have adjustment in the panel brackets, so a door that has dropped or tilted can normally be brought back into line without new parts. The important part is why it moved. A door that settles is also a door whose gasket has stopped sealing at the top corner, and that drives run time, frost and ice-maker trouble. If the hinge cam or the closing mechanism is worn rather than loose, adjustment alone will not hold and the hardware needs replacing.
Is a 42 or 48 inch KitchenAid built-in worth repairing?
Almost always, and more so than a freestanding refrigerator of the same age. A built-in is sized and trimmed into the cabinetry, so replacing it is rarely just a swap. Hinges, gaskets, fans, defrost parts, ice makers and water valves are routine repairs on these units, and parts for the built-in line stay available far longer than for entry-level models. The conversation changes only with a sealed-system failure on an old cabinet, and even then a technician should put a number on it before you price a replacement with cabinetry work attached.
Related Pages
- KitchenAid and JennAir Built-In Repair in Los Angeles and the South Bay
- KitchenAid Refrigerator Not Cooling: What Usually Fails
- KitchenAid Appliance Repair
- JennAir Refrigerator Repair in The Meadows, Lake Forest
- Sub-Zero vs Liebherr Built-In Refrigerators
- Refrigerator Repair in Orange County
- Refrigerator Repair in Irvine
- Sealed-System & Compressor Repair
- Why Is My Refrigerator Not Cooling? 10 Most Common Causes
- Ice Maker Not Working
- Refrigerator Leaking Water
- Refrigerator Making Strange Noises? What Each Sound Means
- Frost Building Up in Your Freezer?
- Refrigerator Maintenance Checklist
- How Long Should a Refrigerator Last?
- Repair or Replace?
- Irvine · Tustin · Lake Forest · Mission Viejo · Laguna Hills · San Juan Capistrano