
Should You Run Oven Self-Clean Before Thanksgiving? Why Ovens Fail Right After Self-Clean
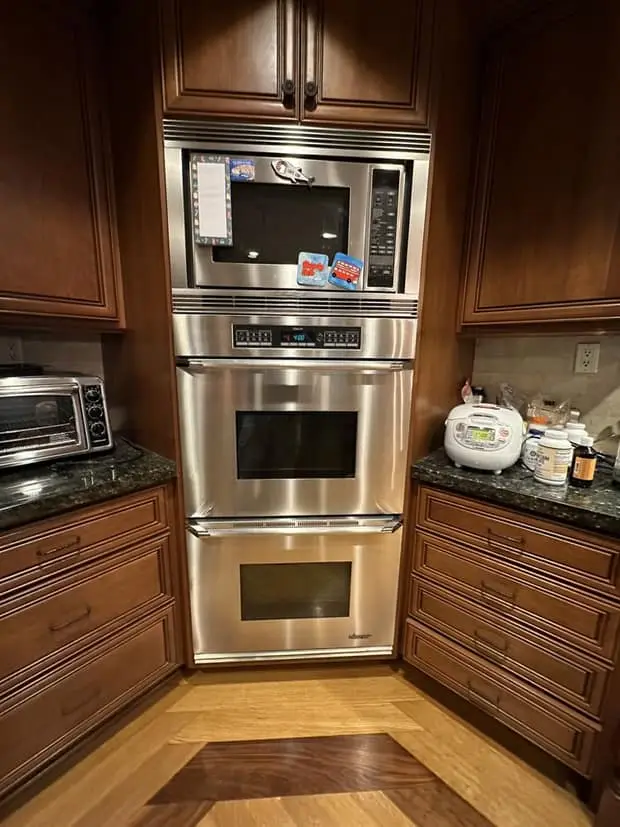
Every year the same call comes in around the third week of November. The oven worked fine. Somebody decided to get it spotless for the holiday, pressed self-clean, and now the display is dark or the door will not open or the oven heats to 300°F and stops climbing. Nothing was broken before the cycle. Something is broken after it.
That is not bad luck and it is not a coincidence. Self-clean is the hardest thing an oven ever does, and it finds every part that was already tired.
We work on ovens and ranges across Irvine, Tustin and Lake Forest, and down the corridor through Mission Viejo toward San Clemente. In October the oven calls are scattered. In the two weeks before Thanksgiving they come in waves, and a large share of them start with the same sentence: "I ran the self-clean."
What the self-clean cycle actually does to your oven
Pyrolytic self-clean, which is what almost every full-size oven sold in the last twenty-five years uses, works by burning the soil off instead of dissolving it. The oven locks its own door, heats the cavity to somewhere around 800 to 900°F depending on the model, and holds it there for two to four hours. Grease and spills turn to a light gray ash you sweep out afterward.
Normal baking tops out at 500 or 550°F, and that is for a few minutes at a time. Self-clean is three hundred degrees hotter and it stays there long enough for everything around the cavity to come up to temperature with it. That is the part people miss. The cycle is not hard on the oven because of the peak number. It is hard because of the hours.
Insulation slows heat down, it does not stop it. Over a three-hour cycle the heat works its way out through the cavity walls into the spaces behind and above, where the wiring, the sensors, the latch motor and the control board live. Those parts are rated for the environment of a normal bake. During self-clean they sit in an oven of their own.
Manufacturers design for this. The cooling fan runs the whole cycle and pulls air through the control housing, the vent dumps hot air out the back or through the rear of the cooktop, and the thermal fuse is there to cut power if any of it goes wrong. On a ten-year-old oven with a fan that has slowed down, a vent path half blocked with grease and a fuse that has already seen fifteen cycles, the margin is a lot thinner than it was on day one.
Which parts actually break, and what each failure looks like
These are the ones we replace, roughly in the order we see them after a self-clean call.
- Thermal fuse. A one-shot safety device, usually mounted in the control housing or on the back panel. It opens permanently when its area exceeds a set temperature and it does not reset. The oven goes completely dead, no display, no clock, no response. Sometimes the cooktop still works on a range, because the surface burners are on a different circuit.
- Door lock motor and latch assembly. The latch motor drives the lock bar across at the start of the cycle and back at the end. It is right at the cavity opening, so it runs hot the entire time. When it sticks, the door stays locked and the control will not let the oven run because it reads the door switch as closed-and-locked.
- Electronic control board. In most ranges the board sits in the panel directly above the oven cavity, which is where heat goes. Relays are the usual failure point. A board that half survived shows up as an oven that heats on broil but not bake, or an oven that ignores the set temperature, or a display with missing segments.
- Oven temperature sensor. The probe at the upper back wall of the cavity is a resistance sensor, usually reading somewhere near 1080 to 1100 ohms at room temperature on common models. Heat cycling drifts it. A drifted sensor does not kill the oven, it just makes it wrong, and you find out when a pie that always took forty minutes comes out raw. If your oven survived the cycle but bakes differently now, read oven temperature problems.
- Bake or broil element. An electric element that was already thinning out tends to fail during self-clean, often with a visible flash and a tripped breaker. You can usually see the blister or the break in the coil.
- Wiring and terminals. The spade terminals at the back of the cavity discolor and the insulation on the leads gets brittle after repeated cycles. A loose or burned terminal at the element is a common find and it is the reason a technician looks behind the back panel even when the fuse is the obvious culprit.
- Door glass and hinges. Less common, but the inner glass can crack and the hinges can relax enough that the door no longer seals flat. A door that does not seal makes the oven run long and heat unevenly for the rest of its life.
Symptoms after a self-clean and what they point to
| What you are seeing | Most likely causes | What to do |
|---|---|---|
| Oven completely dead, no display | Tripped breaker, blown thermal fuse, board lost power | Reset the breaker once, then call |
| Door still locked, oven is warm | Normal. Lock stays engaged above roughly 500°F | Wait one to two hours |
| Door still locked, oven is cold | Latch motor jammed, lock switch failed, control stuck in clean mode | Breaker off five minutes, then call. Do not pry |
| Display shows an F or E error code | Sensor out of range, latch not reporting, board fault | Write the code down, power cycle once, call |
| Oven heats but never reaches the set temperature | Sensor drift, weak element, relay not holding | Technician |
| Broil works, bake does not, or the reverse | Failed relay on the board, open element, burned terminal | Technician |
| Breaker trips during or right after the cycle | Element shorted to ground, burned wiring at a terminal | Leave the breaker off and call |
| Cooktop works, oven does not, on a range | Thermal fuse or oven control, separate from the surface circuit | Technician |
| Gas oven will not light after the cycle | Weakened igniter that no longer draws enough current to open the valve | Technician. See oven not heating |
| Heavy smoke and a burning smell during the cycle | Too much soil in the cavity, grease in the vent path | Cancel the cycle, ventilate, let it cool |
| Oven runs but baking times all changed | Sensor drift, door no longer sealing | Check with an oven thermometer, then call |
| Clock and lights fine, oven ignores every command | Control stuck in a clean or lock state, failed keypad membrane | Power cycle at the breaker, then call |
What you can safely check yourself
Four things, and they are worth doing before you call anyone.
Check the breaker. An electric oven pulls its heaviest sustained current during self-clean, and a double-pole breaker that has been weakening for years often chooses that moment to go. Open the panel, look for a handle sitting between on and off, push it fully to off and then firmly back to on. Reset it once. If it trips again immediately, leave it off and call, because something downstream is shorted.
Give a locked door time. The lock is doing its job. It will not release until the cavity is back under roughly 500°F, and on a well-insulated built-in oven that can take two hours after the cycle ends. Checking it every ten minutes does nothing but make the wait longer.
Try one power cycle. With the oven cold, switch its breaker off, wait five minutes so the board fully discharges, and switch it back on. This clears a control that is stuck in a clean state on a surprising number of models, and the latch will often run its release the moment power returns. One attempt is enough. Repeating it does not help.
Write down the error code. F-codes and E-codes are not interchangeable between brands, and the exact characters matter. Photograph the display. That one detail often tells us which part to bring, which is the difference between one visit and two during a holiday week.
And one thing to be clear about: do not pry the door. Not with a screwdriver, not with a putty knife, not by hanging on the handle. The latch bar is steel and the parts around it are not. We have seen bent latch assemblies, cracked inner glass and torn door gaskets that all started with a locked door and a frustrated afternoon, and every one of them cost more than the original fault.
What only a technician should handle
The thermal fuse is the clearest example of why. The fuse is cheap and reaching it is not difficult on most models, and there are plenty of videos showing the swap. The problem is that a fuse that opened is telling you something got too hot, and that something is still there. A cooling fan that stopped spinning, a vent path packed with grease, a relay welded closed, a latch motor that stalled and drew current for hours. Put a new fuse in and run the oven and you get a second dead fuse, and often a damaged board along with it.
The same logic applies to the rest of it. A control board is the most expensive part in the oven and it is also the part most often replaced for no reason, because the symptom it produces looks identical to a failed sensor or a burned terminal. The right order is to measure the sensor, inspect the terminals and verify the element before anyone touches the board.
Anything involving the door lock assembly means pulling the control housing on most ranges, with 240-volt connections right there. Element replacement means working at the terminals where the burning happened. Gas models add an igniter that has to be checked for current draw, not just looked at, because a glow bar can light up brightly and still be too weak to open the safety valve. If your gas oven has gone quiet after the cycle, the igniter section here explains what that looks like.
What to do instead, in the week before the holiday
Hand cleaning an oven sounds worse than it is. The trick is to let chemistry do the waiting for you.
- Pull the racks out and wash them separately in the sink or a bathtub with hot water and dish soap. Most manufacturers tell you to remove racks for self-clean anyway, because the heat discolors them and ruins the glide coating on the ones that slide.
- Mix baking soda with water into a loose paste, about three parts soda to one part water. Spread it over the floor, the walls and the inner door glass, thick on the burned spots. Skip the heating elements, the fan cover and the sensor probe.
- Leave it overnight. Twelve hours does most of the work. Six is enough for light soil.
- Wipe it out in the morning with a damp cloth, and use a plastic scraper or an old plastic card on anything that holds on. A spray bottle of white vinegar on the residue makes it foam and lift the last of the powder.
- Dry it and run a short bake at 350°F for fifteen minutes with the window cracked, to drive off any moisture before you cook in it.
Three things to keep away from. Caustic oven cleaner sprays, which are not meant for the porcelain used in self-clean cavities and can dull or pit it. Water or cleaner on the temperature sensor probe at the back wall, which will skew its readings for days or damage it. And aluminum foil on the oven floor, which blocks the airflow path, reflects heat up into the element and bakes unevenly for as long as it stays there. If you want to catch drippings, put a sheet pan on the rack below the dish.
If you are going to self-clean anyway, do it right
Sometimes the oven genuinely needs it, and sometimes there is still enough time. In that case here is how to stack the odds.
- Three to four weeks before the holiday, not three days. That leaves room to order a part and get a technician out without racing the calendar.
- Scrape the heavy soil out first. The more grease in the cavity, the more smoke, and the more work the vent path has to do. Big spills should come out by hand before the cycle starts.
- Racks out, foil out, cookware out. Anything left inside at 900°F either warps or adds to the smoke.
- Open windows and run the range hood. A self-clean cycle smells, and the smoke is real smoke. Keep pets out of the kitchen while it runs, and move birds to another part of the house entirely, since their respiratory systems handle fumes far worse than ours do.
- Be home. Do not start it and leave. If the cavity smokes heavily or something smells electrical, you want to be there to cancel the cycle.
- Run it on a weekday morning. Parts counters and service schedules are open on Tuesday. They are not on Thanksgiving Eve.
- Test it afterward. Once the door unlocks and the oven is cold, set it to 350°F, put an oven thermometer on the center rack and let it run for half an hour. If it holds within about 25°F of the setting, the oven came through fine. If it is off by more than that, or it never gets there, you found the problem with weeks to spare instead of with guests in the driveway.
How to keep the oven from needing self-clean at all
Most of the baked-on mess in an oven is a handful of spills that nobody caught. Wipe a fresh spill out once the oven is warm but not hot, and it comes off with a damp cloth. Leave it, and the next six roasts carbonize it into something only 900°F will remove.
A sheet pan on the rack below anything likely to bubble over costs nothing. So does a quick wipe of the floor and the inner glass after a big roast. Twice a year, pull the racks and give the cavity ten minutes with soapy water. Do that and the question of whether to self-clean before a holiday stops coming up, because there is nothing in there that needs it.
The same thinking runs through the rest of the holiday prep. Our oven checklist for Thanksgiving covers the door seal, the rack positions, the temperature check and the timeline, and it is worth an hour in early November.
When to call us
Call when the oven is dead after the cycle and the breaker is not the answer. Call when the door is cold and still locked after one power cycle. Call when there is an error code, when the breaker trips a second time, when you smell something electrical, or when the oven heats but no longer holds a temperature you can bake with.
And call earlier than feels necessary if the holiday is close. The week of Thanksgiving is the one week of the year when a next-day appointment is not something anyone can promise, ours included. An oven that is behaving strangely on November 10th is a routine repair. The same oven on November 25th is a problem with a deadline attached.
When you call, have the model number ready, which is on a plate behind the door frame or along the drawer edge on most ranges. Tell us what the display shows, whether the door is locked, and when the self-clean cycle ran. That usually decides what the technician loads on the van, and on holiday weeks a first-visit fix is worth a lot more than usual.
Frequently asked questions
Should I run the self-clean cycle before Thanksgiving?
Not in the last two weeks. A pyrolytic self-clean cycle runs the oven cavity at roughly 800 to 900°F for two to four hours, which is far hotter than any cooking you will ever do, and that heat is what kills thermal fuses, door lock motors and control boards. If the oven survives the cycle you saved yourself an hour of scrubbing. If it does not, you are hunting for a part and a technician during the busiest appliance week of the year. If you want the oven clean for the holiday, either run self-clean three to four weeks out so there is time to fix whatever it breaks, or clean it by hand in the days before.
Why do ovens stop working right after a self-clean cycle?
Because self-clean is a stress test the oven was not asked to pass very often. The usual casualties are the thermal fuse, which is a one-shot part that opens permanently when the compartment behind the cavity gets too hot and leaves the oven completely dead. Then the door lock motor and latch, which run at their hottest during the cycle and sometimes jam with the door still locked. Then the control board, which sits directly above the cavity in most ranges and takes the rising heat. Bake elements and temperature sensors that were already near the end of their life also tend to give up during self-clean rather than during a normal bake.
My oven is completely dead after self-clean. What is wrong?
No display, no lights and no response usually means the thermal fuse has opened or the control board has lost power. First check the breaker, since the oven draws its heaviest current during self-clean and a weak breaker often trips at the end of the cycle. Reset it once and see if the display comes back. If the breaker is fine and the oven is still dead, stop there. A blown thermal fuse is a symptom, not a cause, and replacing it without finding out what overheated means the new one blows too. A technician checks the cooling fan, the vent path, the door latch and the relays before putting a new fuse in. There is more on dead displays and power faults in oven won’t turn on.
The oven door is locked and will not open after self-clean. What should I do?
Wait. The lock will not release until the cavity drops below roughly 500°F, and after a full cycle that can take an hour or two. Leave the door alone and let the oven sit. If it is still locked once the oven is cold to the touch, switch the oven off at the breaker for five minutes and turn it back on, which clears the control on a lot of models and lets the latch motor run its release. If it is cold, reset and still locked, the latch motor or its switch has failed and the door has to be released from inside the control housing. Do not pry, do not wedge a screwdriver into the latch and do not pull on the handle. Forcing a locked oven door bends the latch, cracks the inner glass and turns a one-part repair into three.
Is steam clean safer than self-clean?
Much safer for the oven, and much weaker on baked-on soil. A steam clean cycle puts water in the bottom of the cavity and holds it around 250°F for twenty to thirty minutes, so none of the parts see the heat that causes self-clean failures. It loosens light soil and fresh spills and does almost nothing to carbonized grease in the corners. For a holiday clean-up it is the right tool for a fairly clean oven, and it will disappoint you on a heavily used one. On an oven that offers both, steam clean before the holiday and save self-clean for January.
What is the best way to clean an oven before the holidays without self-clean?
Baking soda and water, mixed into a loose paste, spread over the cavity floor, walls and inner door glass, and left overnight. The next morning it wipes off with a damp cloth and a plastic scraper for the stubborn spots. Pull the racks out and wash them in the sink or a bathtub with hot water and dish soap. Keep cleaner off the temperature sensor probe at the back wall, off the bake igniter in a gas oven and out of the vent openings. Skip oven cleaner sprays on a self-clean oven interior, because the enamel used on those cavities is not meant for caustic cleaners. And never line the oven floor with foil, which blocks airflow, reflects heat where it does not belong and skews what the sensor reads.
Oven acting up after a self-clean?
Call us at (310) 600-8152 with the model number, what the display shows and when the cycle ran. We are 5.0 on Yelp, family-owned in Irvine since 2005, and the technician quotes the repair on site before any work begins.
Related Pages
- Oven & Range Repair in Irvine
- Oven & Range Repair in Orange County
- How to Prepare Your Oven for Thanksgiving
- Oven Won’t Turn On? Dead Display, Control Lock and Breaker Checks
- Oven Not Heating? Igniter, Element, Sensor and Board
- Oven Temperature Problems That Can Ruin Thanksgiving Dinner
- What to Do If Your Oven Stops Working on Thanksgiving Day
- Gas Range Burner Won’t Light or Burns Yellow?
- Before the Technician Arrives
- Symptom Index: What’s Wrong With My Appliance?
- Repair or Replace?
- Irvine · Tustin · Lake Forest · Mission Viejo · Laguna Hills · Aliso Viejo · Dana Point · San Clemente