
Refrigerator Maintenance Checklist: How to Keep Your Fridge Running Efficiently in Orange County
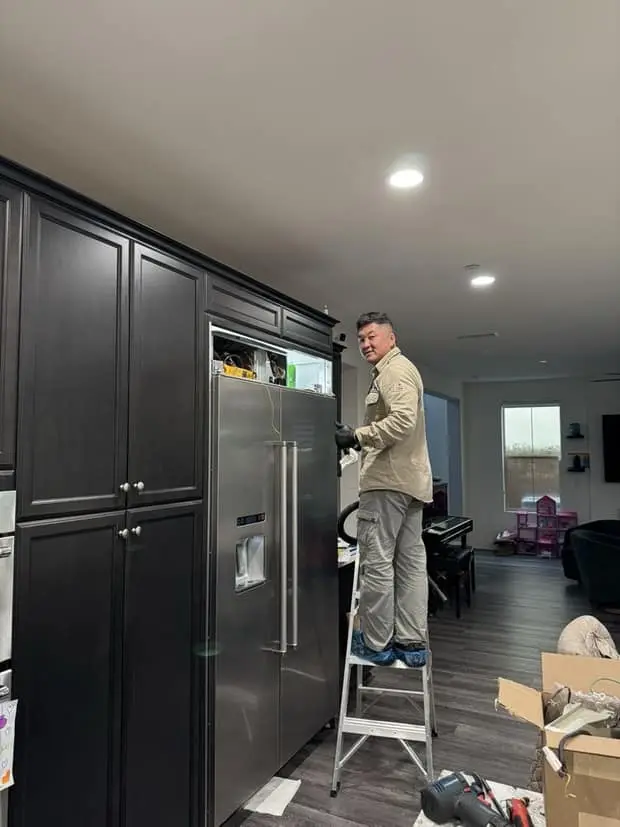
A refrigerator is the only appliance in the house that never turns off. It runs through vacations, through heat waves, through the night — and because it asks for nothing, it gets nothing until the day it stops cooling. Most of the emergency no-cool calls we take across Irvine, Lake Forest and Mission Viejo trace back to something that would have taken twenty minutes of attention a year earlier: a condenser packed with dust, a gasket that stopped sealing two summers ago, a drain tube plugged with residue.
This checklist is what we would do to our own refrigerators. It is organized by how often each job needs doing, explains why each one matters mechanically, and marks clearly where the homeowner's part ends and ours begins. It covers refrigerators specifically — for the rest of the kitchen and laundry room, see our general appliance maintenance checklist.
The maintenance schedule at a glance
| How often | What to do |
|---|---|
| Monthly | Glance at the thermometer; wipe spills before they dry; check nothing is pressed against an interior vent; listen for new noises. |
| Every 3–4 months | Water filter reminder check; quick vacuum of the base grille if you have pets, allergies, or construction nearby. |
| Every 6 months | Deep-clean the condenser coils and condenser fan; wash and dollar-bill-test the gaskets; change the water filter; clear the defrost drain; verify temperatures with a standalone thermometer. |
| Annually | Check the drain pan, confirm the unit is level and doors self-close, inspect the water supply line and shutoff, clean the ice maker and bin, check clearances behind and above the cabinet. |
| After a power outage or a long vacation | Confirm the controls did not reset or land in demo/showroom mode; verify temperatures before restocking. |
1. Condenser coils — the one job that matters most
Everything the refrigerator removes from inside the box has to go somewhere, and that somewhere is the condenser coil. On most freestanding models it sits underneath, behind the base grille, with a small fan pulling air across it. On built-ins and columns it usually lives in a machine compartment at the top of the unit, behind a grille just below the ceiling of the cabinet.
When that coil is wrapped in a felt of dust, pet hair and cooking grease, it cannot shed heat. Pressure on the high side climbs, the compressor runs hotter and longer, and on a warm afternoon the box simply cannot get down to temperature. This is the single most common preventable cause behind the calls described in our guide to a refrigerator that runs but does not cool.
How to do it:
- Unplug the refrigerator, or switch off its breaker. This is not optional — you are about to put a vacuum nozzle next to a fan and live wiring.
- Pull the base grille. On most models it unclips or lifts off; a few use two screws.
- Vacuum with a crevice tool, then work a long, flexible coil brush through the fins and vacuum again. Brush in the direction of the fins, not across them — bent fins block airflow as well as dust does.
- Clean the condenser fan blades while you are in there. A blade caked on one side goes out of balance and the motor bearings pay for it.
- If the coil is on the back of an older freestanding unit, pull the fridge out and vacuum the whole coil and the wall behind it.
- Plug it back in and give the refrigerator several hours to recover before judging the result.
How often: every 6 to 12 months for a typical household. Every 3 to 4 months with shedding pets, in a home with a cook who sears a lot, or during and after a remodel — drywall dust finds condenser coils like it was aimed at them. Homes near the coast in Dana Point and San Clemente have one more reason to keep the schedule: salt-laden air leaves a film on the fins that traps dust faster than inland air does.
2. Door gaskets — clean them, then test them
A door gasket is a maintenance item, not a permanent part. It takes a compression cycle every time the door closes, it collects syrup and milk and jam at the bottom corners, and it slowly hardens. A gasket that no longer seals lets warm, humid room air pour in around the clock: the compressor runs almost continuously, frost builds on the evaporator faster than the defrost cycle can clear it, and the fresh-food side quietly loses ground.
Clean first. Warm water with a little dish soap on a cloth, run around the whole gasket including the folds, then dry it. Sticky residue is the most common reason a perfectly good gasket does not seat. Do not use bleach, solvents or abrasive pads — they harden the material and shorten its life.
Then test. Close the door on a dollar bill so half of it sticks out, and pull. You should feel clear drag. Repeat every eight to ten inches all the way around each door, including the top corners and the hinge side, which is where people forget to check. Anywhere the bill slides out freely, that section is not sealing.
What a failing gasket looks like: condensation on the outside of the cabinet near the door edge, a persistent damp smell inside, frost forming on one side of the freezer, ice around the door frame, or a fridge that never seems to shut off. In humid inland evenings around Tustin and Laguna Hills, an exterior sweat line along the door edge is often the first sign.
What you can do vs. what we do: cleaning, the dollar-bill test, and re-seating a gasket that has popped out of its channel are all homeowner jobs. A cracked, torn or hardened gasket should be replaced, and on built-in and premium units the gasket is model-specific and sometimes heated or magnetically tuned to the door — that is a service call, and a straightforward one.
3. The defrost drain — where the puddle under the crisper comes from
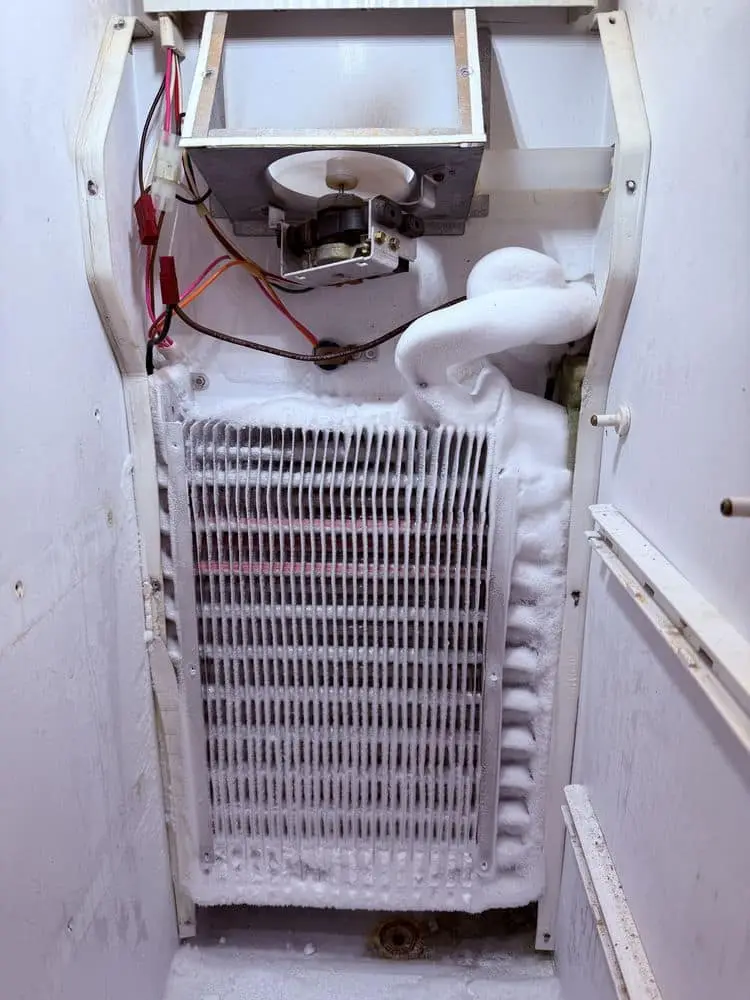
Frost-free refrigerators deposit frost on the evaporator during normal operation and melt it off several times a day with a small heater. That meltwater runs down a drain trough, through a tube, and into a shallow pan near the compressor, where the compressor's heat evaporates it. The whole system is invisible until it clogs.
When food particles, mineral scale or ice plug that tube, the water backs up. It shows up as a sheet of ice under the crisper drawers, water pooling in the bottom of the fresh-food compartment, or — when it finally overflows the trough — a puddle on the kitchen floor that looks like a plumbing leak. We cover the full set of causes in refrigerator leaking water; here the point is that the drain is a maintenance item.
How to keep it clear: twice a year, empty the bottom shelf and the drawers, wipe out any water, and locate the drain opening at the back of the fresh-food compartment floor or at the bottom of the freezer's evaporator area. Flush it with a few ounces of warm (not boiling) water using a turkey baster. If the water drains away, you are done. If it backs up, do not push a coat hanger or anything metal into it — you can pierce the tube or damage the evaporator behind the panel. A soft, flexible tube-cleaning brush is the right tool, and if that does not clear it, the blockage is likely ice inside the tube rather than debris.
When it is not maintenance: if ice re-forms in the same spot within days of clearing it, or you find a solid block of frost across the freezer's back panel, the defrost system itself — heater, bi-metal thermostat, or the control that runs the cycle — has failed. Some models also have a known-weak drain design where a small heater clip or a P-trap modification is the real fix. That is a diagnosis, not a cleaning.
4. Water filter, supply line and ice maker
Anything that carries water is on a schedule whether you keep it or not. Orange County's water is hard enough that scale is a genuine maintenance factor, not a theoretical one.
Water filter
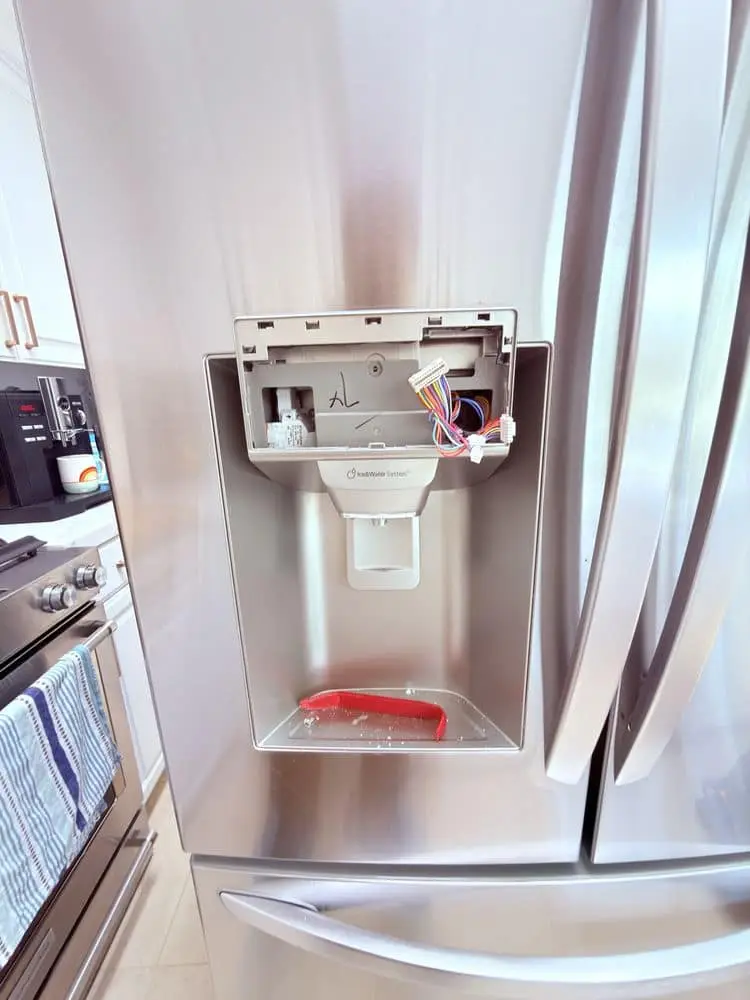
Most manufacturers specify six months. Beyond taste, a restricted filter reduces flow, and reduced flow is the first thing you notice as a slow dispenser and as small, hollow or misshapen ice cubes. Because the ice maker and the door dispenser usually share the same filtered line, a neglected filter mimics a failing ice maker convincingly — which is why our ice maker guide starts there. Change it, then run two to four gallons through the dispenser to purge air and carbon fines, and reset the filter indicator.
Supply line and shutoff
Once a year, pull the refrigerator out far enough to look at the water line behind it. You are looking for kinks, a line pinched by the cabinet or the fridge's own wheels, corrosion or a bead of moisture at a fitting, and a shutoff valve you can actually find in a hurry. Saddle valves — the small clamp-on valves common in older homes — are the ones that fail quietly. Know where your shutoff is before you need it. If a fitting weeps, deal with it then; a slow leak behind a refrigerator finds the subfloor long before it finds your attention.
Ice maker and bin
Empty the bin once or twice a year and wash it. Ice absorbs odors, cubes fuse into a block when they sit too long, and a block in the bin jams the auger and strains the dispenser motor. If your household goes through ice slowly, dumping the bin quarterly is worth it just for the taste. While the bin is out, look at the fill tube behind the ice maker for a plug of ice, which means the fill valve is dribbling or the freezer is running warm.
5. Ventilation and clearances — especially for built-ins
A refrigerator needs to inhale cool room air and exhale warm air. Freestanding units want an inch or two of clearance at the back and above, and a base grille that is not blocked by a floor mat, a recycling bin or a row of pet bowls. Pushing a fridge hard against the wall to gain counter space is a false economy: you have just insulated the coil.
Built-ins and columns deserve their own paragraph. Sub-Zero, Liebherr, Thermador, Viking and similar integrated units are designed to breathe through a grille at the top of the surrounding cabinetry. That grille is the entire ventilation system. When it gets covered by a decorative panel after a kitchen remodel, packed with dust, or blocked by cereal boxes stored on top of the cabinet, the machine compartment cooks itself. On these units we check the grille and the top condenser before anything else, and we clean them more aggressively than a freestanding coil because there is less margin. If you own a built-in, put "clean the top grille" on the same six-month schedule as the coils — and see our Liebherr owner's guide or the guide to Sub-Zero units not cooling for model-specific patterns.
Garage refrigerators are the other special case, and they are everywhere in Orange County. A second fridge in an uninsulated garage faces ambient temperatures far outside what a standard unit was designed for. In summer the condenser has nowhere to dump heat and the compressor runs continuously; in a cold snap some models stop running the compressor at all because the fresh-food thermostat thinks it is satisfied, and the freezer thaws. If you keep a garage fridge, choose a garage-ready model, keep it out of direct sun, and give the coils twice the attention you give the kitchen unit.
6. Verify temperatures — do not trust the display
Set the fresh-food compartment to about 37°F (3°C) and the freezer to 0°F (−18°C). Then verify with an inexpensive standalone thermometer left in each compartment for several hours, ideally overnight. Many refrigerators display the setpoint rather than the actual temperature, and on some models the sensor feeding that display is the very part that has drifted.
Do this twice a year and keep a thermometer in the fridge permanently if you can. The value is early warning: a refrigerator that has crept to 42°F is usually telling you about a coil, a fan or a gasket while the problem is still small and cheap. The same refrigerator discovered at 55°F a week later means spoiled groceries and, often, a compressor that has been running flat out for days.
Two related habits: let hot leftovers cool before covering and refrigerating them, because the extra humidity ends up as frost on the evaporator; and keep the box reasonably full but not packed. An under-filled refrigerator has no thermal mass to hold temperature between cycles, and an overpacked one blocks the vents that distribute cold air.
7. Level, doors and the drain pan
Once a year, confirm the refrigerator is level side-to-side and tilted very slightly back, so the doors swing closed on their own from a few inches open. A unit that has drifted out of level — common after a floor replacement — leaves doors resting open a quarter inch, which is functionally the same as a failed gasket. Adjust the front leveling legs; most are a simple threaded foot or a screw behind the base grille.
Check the drain pan under the unit at the same time. It should be dry or lightly damp, seated properly, and free of the sludge that accumulates when it never gets cleaned. A pan that is consistently full points back at the drain, a gasket, or humidity getting in somewhere. While you are behind the fridge, wipe the floor and the wall — the dust that collects there is the same dust the condenser will inhale next.
What you can safely do yourself, in order
- Unplug, pull the base grille or top grille, vacuum and brush the condenser coils and fan blades.
- Wash the gaskets with warm soapy water; run the dollar-bill test around every door.
- Flush the defrost drain with warm water; never probe it with anything metal.
- Change the water filter, purge the line, reset the indicator.
- Empty and wash the ice bin; look for an ice plug at the fill tube.
- Restore clearances at the back, top and base grille; clear anything stored on top of a built-in cabinet.
- Verify both compartments with a standalone thermometer.
- Check level, self-closing doors, the drain pan and the water supply line once a year.
Leave to a technician: gasket replacement on built-in and premium units; evaporator fan, condenser fan and damper motors; thermistor and control-board diagnostics; defrost heater and bi-metal testing; compressor start components; and anything inside the sealed refrigerant loop. A refrigerator combines 120-volt wiring with a damp environment and a pressurized refrigerant circuit — the list above is the safe boundary, and we are not being precious about it.
Signs your maintenance has found a real problem
- Coils cleaned, gaskets sealing, and the compressor still runs nearly nonstop.
- Frost across the freezer's back panel that returns within days of being cleared.
- A drain that will not flush, or water that reappears under the crispers within a week.
- A condenser fan that does not spin whenever the compressor runs, or a compressor too hot to touch.
- New noises: a rhythmic scrape or chirp from behind the freezer's back panel, or a click-hum-click every few minutes from the compressor. The sound itself is diagnostic.
- Any burning or electrical smell, a breaker that trips when the refrigerator starts, or an oily residue near the compressor. Stop and call.
If cooling has already fallen off, work through the ten causes of a refrigerator not cooling before calling — knowing which compartment is warm and what the compressor is doing shortens our diagnosis considerably. If it is the freezer specifically, start with freezer not cooling or freezing.
Does maintenance actually pay for itself?
Two honest answers. On the energy side, maintenance reduces run time, and run time is what the meter charges for — a clean condenser, a sealing door and an unobstructed coil all let the compressor cycle off sooner. We will not quote you a percentage on your bill, because it depends on the model, the kitchen temperature and your rate plan, and anyone who gives you a precise number is guessing.
On the repair side the case is clearer. A compressor that runs 90% of the time because it is fighting a dust blanket is doing several years of wear per year. Fans fail early when their blades are unbalanced with grime. A gasket left torn produces exactly the frost problem that then takes out the evaporator fan. Most of the failures we see are not random — they are the second act of something that went unnoticed. And when a major part does eventually fail, the repair-or-replace decision goes better on a unit that has been looked after.
When to call us instead
Two situations. The first is anything on the list above that turns up a real fault — a drain that will not clear, frost that comes back, a fan that does not run, a gasket on a built-in. The second is when you would simply rather it were done properly: on built-in, column and premium refrigerators, a maintenance visit that includes the top condenser, the drain, the gaskets, the fans and verified temperatures is time well spent, particularly before a summer or before a holiday season when the fridge will be full and opened constantly.
Our technician measures actual compartment temperatures, reads the frost pattern on the evaporator, tests both fans, the damper, the defrost circuit and the thermistors, and checks the condenser and the compressor's start components. You get a clear explanation and a quote on site before any work begins, and most refrigerator repairs are completed the same day from parts stocked on the truck, backed by our 90-day parts and labor warranty. We offer Factory Authorized LG Repair and Factory Authorized Liebherr Repair; for Samsung we are Samsung-Certified Technicians; and we provide professional repair for Sub-Zero, Thermador, Viking, Bosch, GE, Whirlpool, Frigidaire and most other brands found in South Orange County kitchens.
See our refrigerator repair service page, or the local pages for Irvine, Lake Forest, Mission Viejo, Laguna Niguel, Aliso Viejo and San Clemente.
Frequently Asked Questions
How often should I clean refrigerator condenser coils?
Every 6 to 12 months for a typical household, and every 3 to 4 months if you have shedding pets, run a remodel nearby, or the refrigerator sits in a tight built-in cabinet. Built-in and column refrigerators with a top machine compartment pull dust from the whole kitchen and usually need attention on the shorter interval. Unplug the unit first, pull the base grille, and vacuum with a crevice tool and a coil brush.
What temperature should my refrigerator and freezer be set to?
About 37°F (3°C) in the fresh-food compartment and 0°F (−18°C) in the freezer. Verify with a standalone thermometer rather than trusting the display, because many refrigerators show the setpoint, not the actual temperature, and on some models the sensor feeding that display is the part that fails first. Check it twice a year; a fridge that has drifted to 42°F is telling you something is starting to go wrong.
How do I know if my refrigerator door gasket needs replacing?
Close the door on a dollar bill at several points around the frame and pull. If it slides out with no drag anywhere, that section is not sealing. Wipe the gasket with warm soapy water first, since sticky residue is the most common reason a good gasket fails to seat. Replace a gasket that is cracked, hardened, torn, or has pulled out of its channel — living with it means the compressor runs almost continuously and frost builds faster than the defrost cycle can clear it.
Do I really need to change the refrigerator water filter every six months?
Six months is the common manufacturer interval, and in much of Orange County the hard water makes it a real interval rather than a suggestion. A neglected filter restricts flow, which shows up first as slow dispensing and small or hollow ice cubes. On many models the ice maker and dispenser share the filtered line, so a clogged filter looks exactly like a failing ice maker.
Why does water collect under my crisper drawers?
Usually a clogged defrost drain. Water from the normal defrost cycle is supposed to run down a small tube to a pan near the compressor, where it evaporates. When food residue or ice plugs that tube, the water backs up and appears under the crisper drawers or, eventually, on the floor. Clearing the drain is maintenance; ice that re-forms in the same spot within days points at the defrost system itself.
Does refrigerator maintenance actually lower the energy bill?
It lowers run time, and run time is what you pay for. A dust-packed condenser, a gasket that leaks warm air, or a coil starved of airflow all force the compressor to run longer for the same interior temperature. We cannot promise a percentage on your bill — that depends on the model, the kitchen and the rate plan — but a refrigerator whose coils breathe and whose doors seal cycles noticeably less than the same unit neglected for three years.
Related Pages
- Refrigerator Repair in Orange County
- Refrigerator Repair in Irvine
- Sealed-System & Compressor Repair
- Why Is My Refrigerator Not Cooling? 10 Causes
- Refrigerator Leaking Water
- Freezer Not Cooling or Freezing
- Ice Maker Not Working
- Liebherr Refrigerator Owner's Guide
- Sub-Zero Refrigerator Not Cooling
- Whole-Home Appliance Maintenance Checklist
- Repair or Replace?
- Tustin · Laguna Hills · Rancho Santa Margarita · San Juan Capistrano · Dana Point · Costa Mesa